


Hand-Painted Witch Cafe: Texturing a Stylized Scene
Finn Stevens-Lock talked about their small cozy scene Witch Cafe made during one of the courses at CGMA: idea development, different approaches to texturing, the use of a 2.5D art technique, and lighting.
Introductioon
Hi there! My name is Finn Stevens-Lock and I’m a 3D artist, specializing in stylized environments and props. I’m from the UK, and I currently live in Plymouth. I graduated from Plymouth College of Art in 2018 having studied Game Arts. It was during my time at university that I realized my love for stylized art by beginning to create it myself. Having played video games for most of my life, I can still remember the bright, inviting colors in the platformers of my childhood such as Spyro, Crash, and Croc. Those games have really inspired me and continue to do so.
That being said, I’ve been creating 3D art for about five years or so now, but only in the last year have I really begun focusing on my craft and pushing myself to develop my skills. I currently work as a contract artist for Dekogon Studios, and I’m also doing personal projects for my portfolio while I look for work!
Taking a Course at CGMA
I was introduced to CGMA by a close friend of mine who has also done a few courses with them. They sang the praises of the lessons and the instructors, and I was really eager to take a course myself. Since I graduated in 2018, I felt like I’d been lacking direction with my art and how to level up my skills, so organized online learning felt like a really good way for me to move forward. I took Ashleigh Warner’s Creating Stylized Assets for Games course at CGMA during the lockdown. The stars aligned here for me so that I was able to take the course – I’d been furloughed from my previous job, and I felt it was the perfect time for me to just really indulge in art.
The main goal I had was to simply turn something in every week. It’s a very intense ten-week course, and with the exception of the last week, I managed to achieve my goal! Other than that, I wanted to get some more experience with hand-painting my textures, learn some new techniques, and just be in a learning environment with great feedback.


Witch Cafe: Idea and Concept
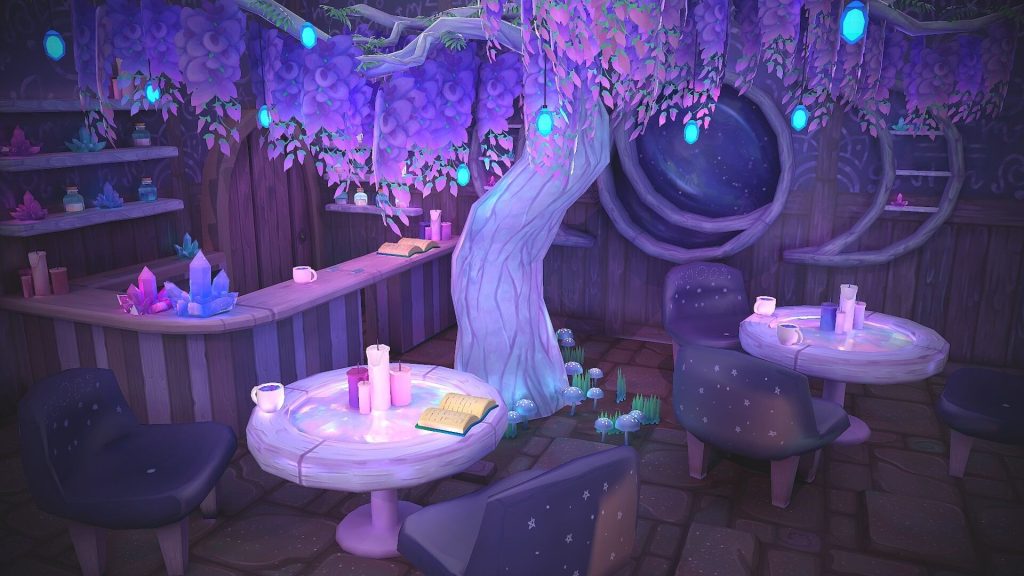
For my cafe scene, I was really inspired by these cafes I found on Pinterest that had trees growing in them. I thought it was a really interesting concept to bring the outside inside, and wanted to explore that with my project. I’m also personally inspired by and interested in magical, witchy aesthetics. Finally, I was really grieving for the loss of my social life during the lockdown. I wanted to create a piece that reminded me of my friends, and somewhere that I could envision us all hanging out.
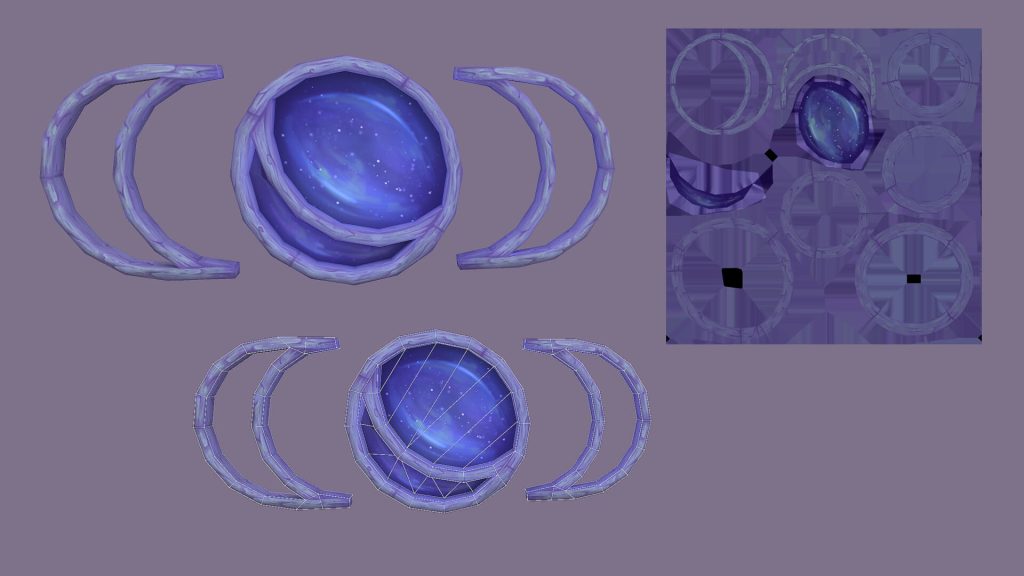
I knew I wanted to attempt to create the scene in the style of World of Warcraft – with an instructor who works for Blizzard, it just made sense to try and emulate this style. I used references of individual objects to build my scene around: for example, I found an image of a cafe that had a giant arbor covered in wisteria and a shelving unit shaped like the phases of the moon. I try to use references loosely when I create a concept, with maybe one or two images that I can play with and try and create something new.
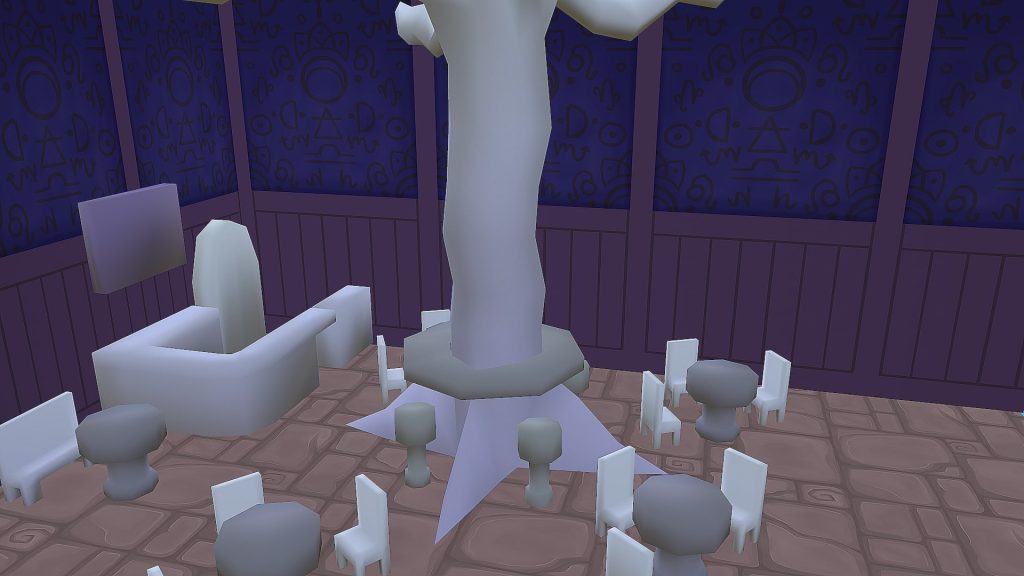
When it came to the production stage of the project, the concept was pretty strong and fully formed in my mind, so it didn’t actually change that much from beginning to end. I developed my concepts a little further when it came to the modeling stage: the tables you see in the cafe didn’t originally have an opal tabletop, but it’s nice to have that freedom to change and develop ideas as the project progresses. I think if I made the scene again I’d make some tweaks here and there, but the original brief was to create the scene in five weeks, and the intensity of the project didn’t really allow for that much thought once I got started!

General Workflow for Modeling and Texturing
For modeling, I used 3ds Max. I began the scene with a blockout to work out where I wanted everything to be and to get the proportions right. Then, I refined the models and prepared them for texturing. I used 3D Coat and Photoshop in tandem for the texturing of the models.


A lot of my scene is made up of tiling textures, which I would say is probably the technique that I’ve gotten the most out of so far. The walls, floor, counter, and tree all use tiling textures. It’s such a great way to texture large parts of a scene quickly. To create these textures, I used Photoshop’s offset tool.
We also learned about 2.5D art techniques, where you work backward by creating the texture first and then adding geometry later. I used that technique throughout the rest of the course, actually! That was how I created the wisteria flowers that hang over the cafe.
Finally, during the course, my modeling just improved overall. While I’m not extremely confident in my modeling, by the end of the course I felt that I had a better grasp on it, and I felt I could continue to improve. I was able to get a lot of help from both Ashleigh and my peers through the Discord we shared.
Working on Stylized Textures
All of my textures and materials were created in either Photoshop, 3D Coat, or both. My process for creating stylized materials involves looking at real-world references and painting something that looks similar, but not totally the same. I try to keep a medium level of detail in all of my textures, with large chunky shapes. My textures are more approximate than accurate, which I think gives things a little more of a whimsical look. The bark of the wisteria tree, for example, is where I used a reference but took a lot of artistic liberties for the final result. I also ended up painting an inordinate amount of wood for this project, so I was able to paint wood quite quickly and with an established workflow.
My favorite texture of this piece is the surface of the opal table. I adore the look of opals and how many colors there are in them, and it took a lot of painstaking brush strokes to recreate it.

Adding Small Details
The smaller assets were really enjoyable for me. They were all super quick to make and I feel like they really pulled the scene together, making it look lived in and cozy. I used planar maps and gradients to texture all of the smaller assets, as I didn’t need them to have any kind of detail because you can’t really see it in the final images.
With regards to the flowers and leaves hanging from the tree, they were all placed individually by hand along the branches of the tree in 3ds Max. I wanted them placed in such a way that the ceiling looked full of blooms.


Challenges and Future Plans
One of the biggest challenges in this project for me was actually knowing when to stop adding assets. It’s quite a small scene, and I had ideas to add a lot more than what ended up in the final cut. The composition as well helped me make those decisions on what to keep and what to remove: I spent a lot of time in the blockout stage moving things around and trying to make the scene look cozy without it being too packed.
My instructor gave us feedback every week over the five weeks of the project. Using that feedback, I was able to develop the scene a lot more.
My next endeavour is to learn UE4, and I’m working on a scene right now that I hope will become a great portfolio piece. I’ll also be continuing to look for work!
