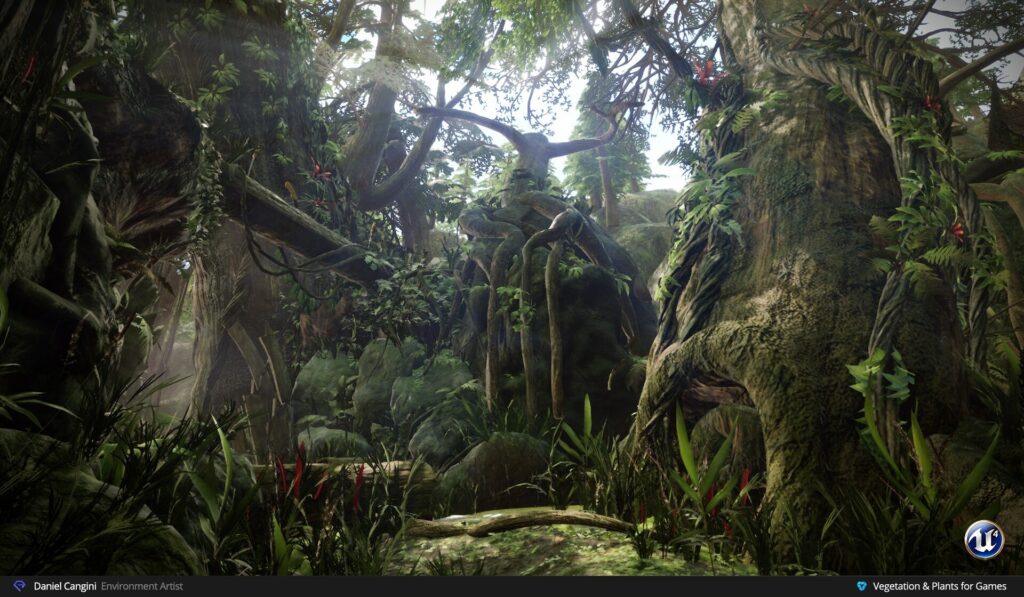
Recreating Uncharted 2's Borneo Environment
Daniel Cangini shows how he recreated the Uncharted 2 Borneo Environment in Jeremy Huxley’s Vegetation and Plants for Games. Daniel discusses the blockout, vegetation, trees, rocks, material production, lighting, and more. Software used includes: UE4, 3ds Max, ZBrush, Substance Designer.
Introduction
Hello everyone! My name is Daniel Cangini and I am an environment artist who currently works as a graphic designer in Rome, Italy. In 2012, I obtained a Bachelor’s Degree in the University of Rome “La Sapienza” in the Graphic and Multimedia Project focused on “3D Digital Art & Design” and have been taking CGMA courses in my free time ever since. I fell in love with creating environments and worlds that would capture people’s imaginations.
Uncharted 2 Borneo Level
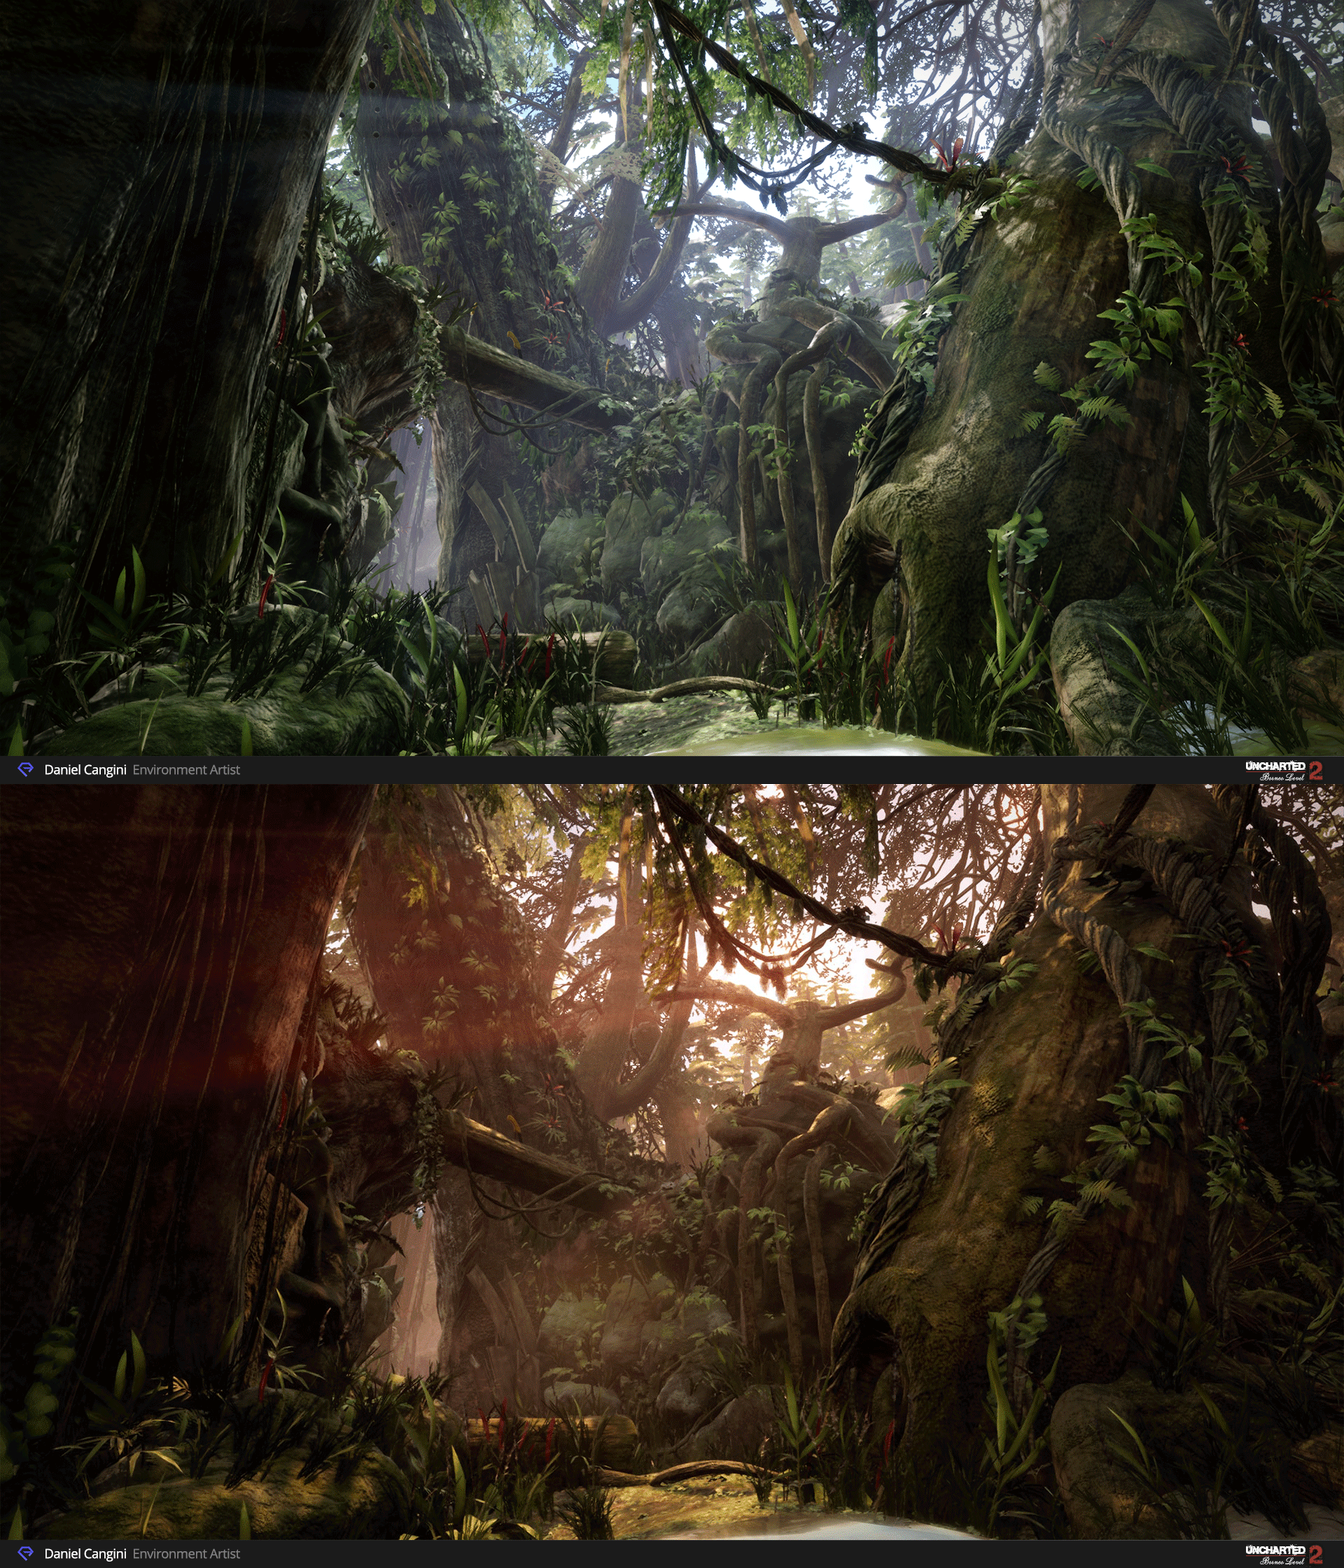
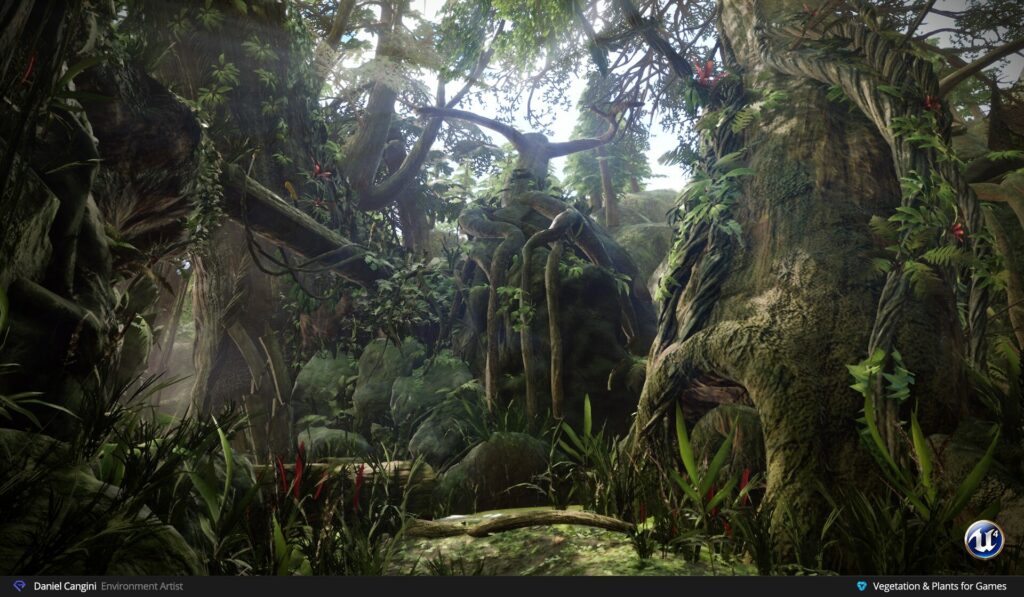
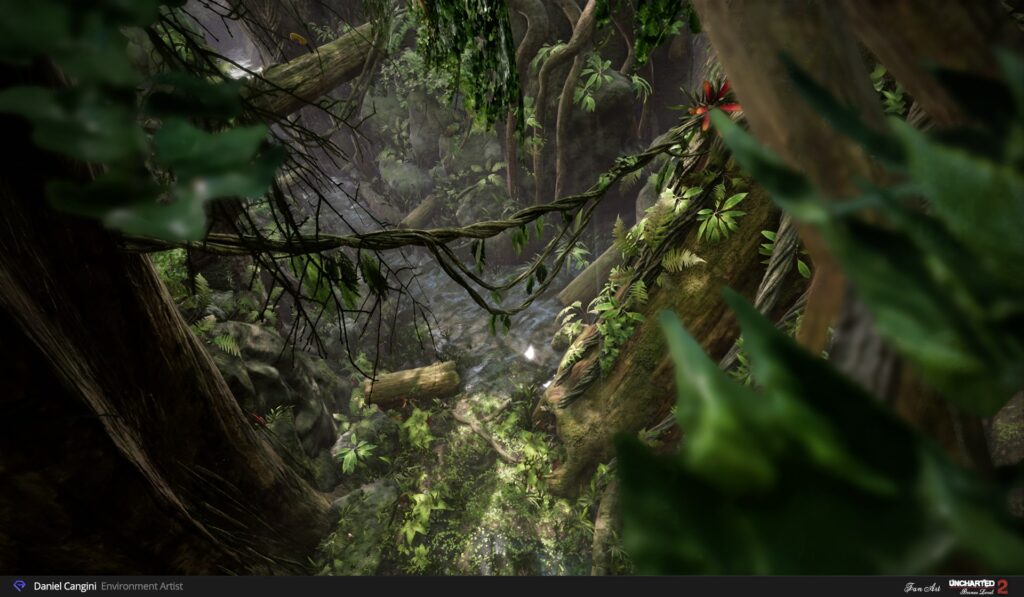
About the Project
Uncharted 2 is a masterpiece of game art and I loved many things in the great Borneo scene: beautiful colors, powerful vegetation, and awesome terrain. I thought this was a great opportunity to recreate one of the levels that I loved for Jeremy Huxley’s Vegetation and Plants for Games course at CGMA.
My main goals for this scene/course were to work on a natural environment, learn a solid technique for foliage, trees, and rocks, sculpting and texturing plants, blend materials with Substance Designer, gain more experience in UE4. The main thing I wanted to do was to recreate the scene in Unreal Engine as precisely as possible. I took care to keep the quality of the details and bring them closer to the graphics of Uncharted.
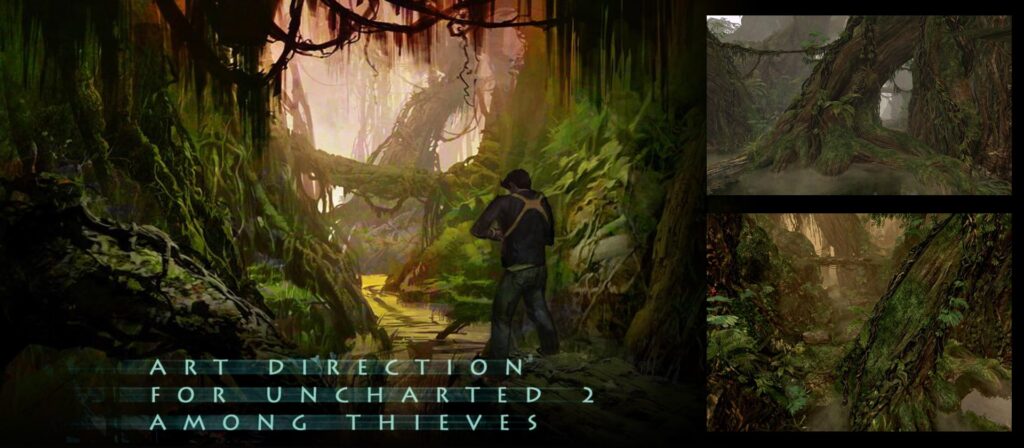
I started looking for some cool concepts and ideas on the internet. I think one of the most important resources for any Environment Artist is the Art Direction for Uncharted 2: Among Thieves. It covers the visual development process of the environments and walks you through the way we apply design principles to translate a 2D concept art to a complete 3D interactive environment.
Reference & Inspiration
My work began with a concept for the game Uncharted 2. This concept was perfect for the course. There was a lot of vegetation and ground terrain in it, and it also recreated the mystic level atmosphere (Day & Afternoon) that is not so easy to express.
I started by gathering a lot of references to have a clear view of all the details and proportions. For vegetation, I found many tropical forest references.
After spending some time gathering the reference, I started looking through the images and making decisions on the style guide and my basic color palette.
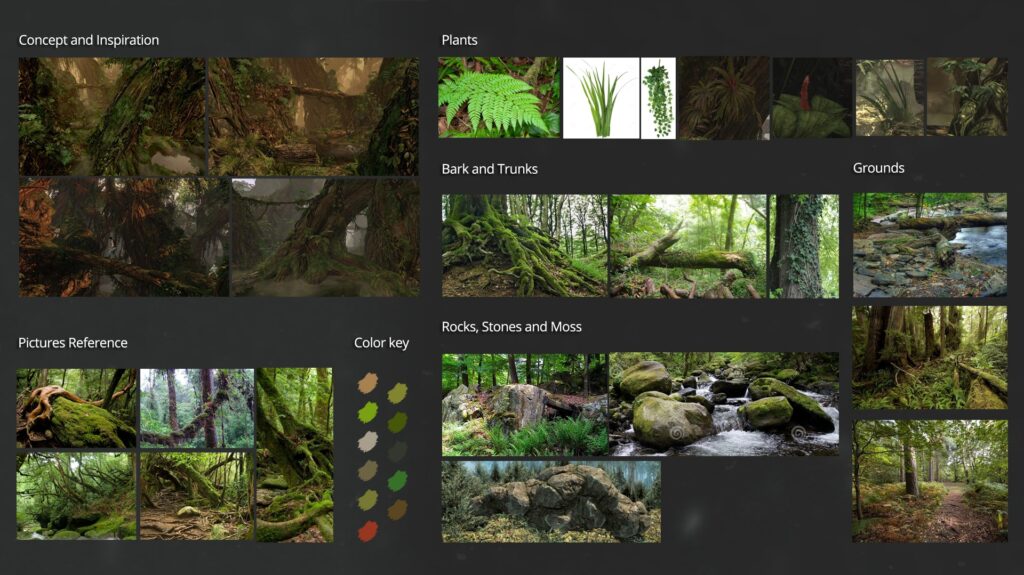
Next, I decided first to determine the type of terrain and which plants and trees can grow on it.
Blockout
When I started the blockout, it was important for me to make a decision about the composition of my level. For this environment, I wanted something with one main beauty shot and focal points in all the right places.
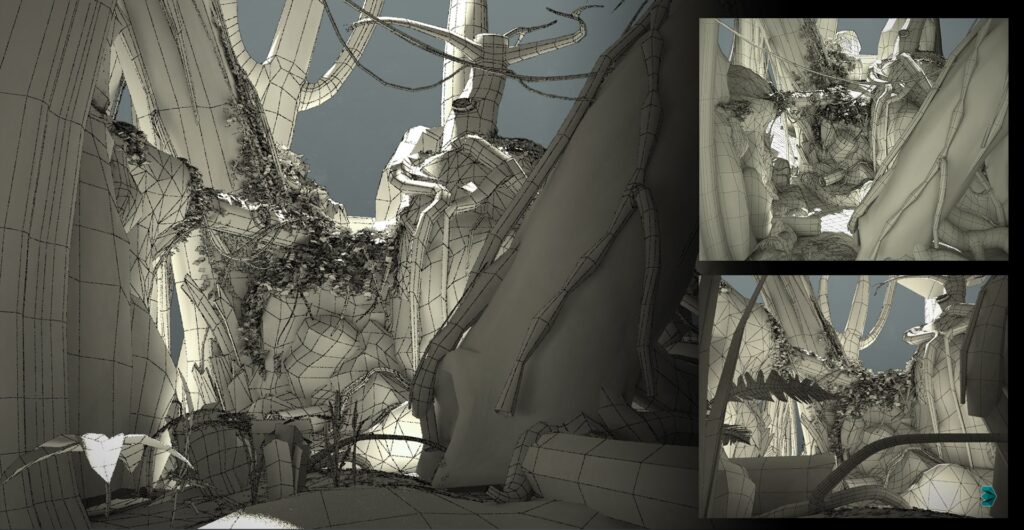
I began to block out the main elements inside 3ds Max and concentrated on the proportions and scale of the assets. This was the best way to test the composition and scale of the assets in a 3D space and make quick changes before creating the final pieces.
Rocks
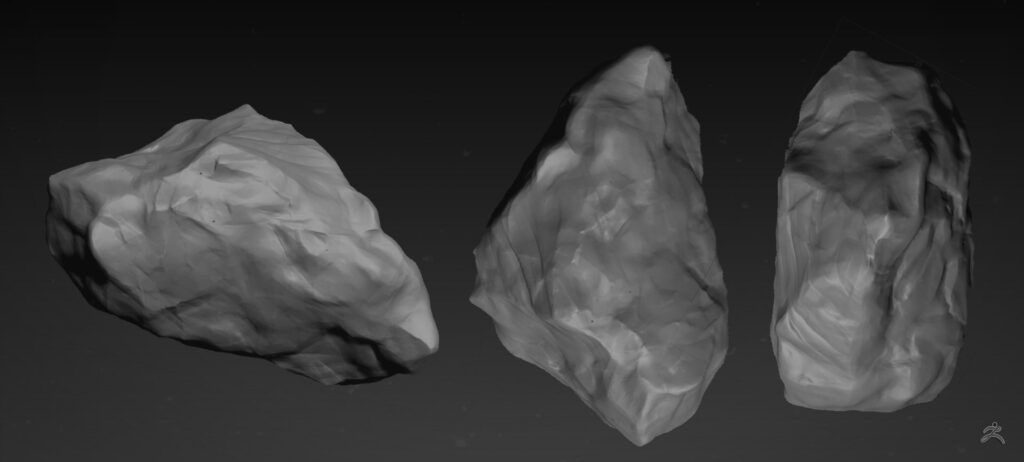
The sculpting of the rocks has been a big challenge for me. The biggest key here was to keep it simple. I started focusing on the silhouette, shapes, and composition and I made rocks that worked well from multiple angles in different situations. I focused on the larger details that allow the rocks to be scaled in many different ways.
The details will be added later with a tileable material and combined with the normal bakes in our shader.
These are the main rocks used in my scene:
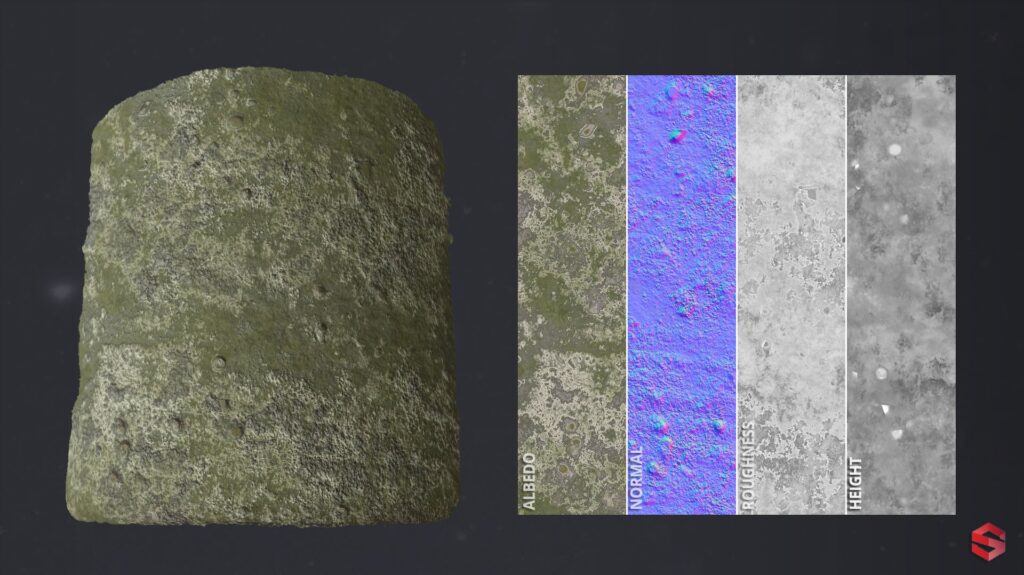
It was a challenge for me to use Substance Designer. I first concentrated on large shapes and then worked down to micro details by blending a few variations of slope-blurred cell nodes for the height. Only after I obtained the final height I added the Albedo / Roughness / A.O / Normal.
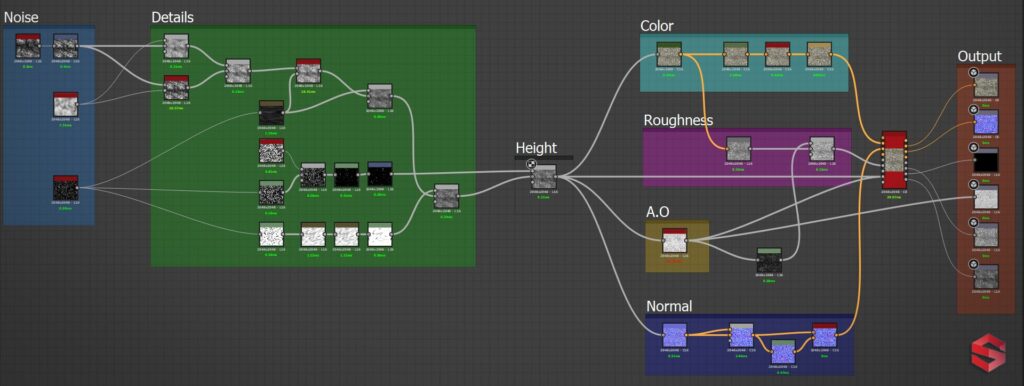
Moss and Rock material combined in Substance Designer:
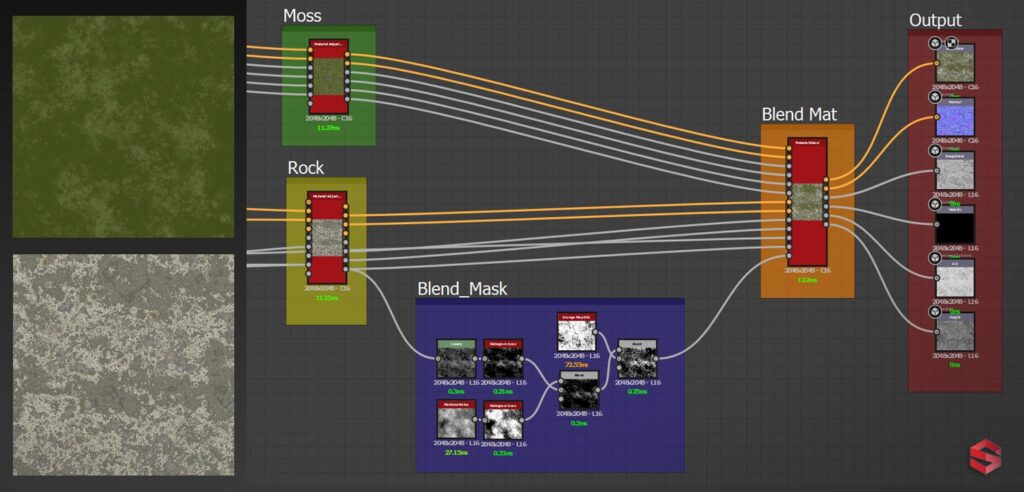
Here’s the final result which I built in Substance Designer:
During the next step, I created the shader in Unreal learned during Texturing and Shading for Games with Kurt Kupser where I found out how to create the master materials in UE4 like prop material, layered material, refraction material, wind material, hologram material, terrain and architectural material, mesh decal material, and foliage material.
I started to blend multiple different layers to paint a combination of different textures and materials on a static mesh.
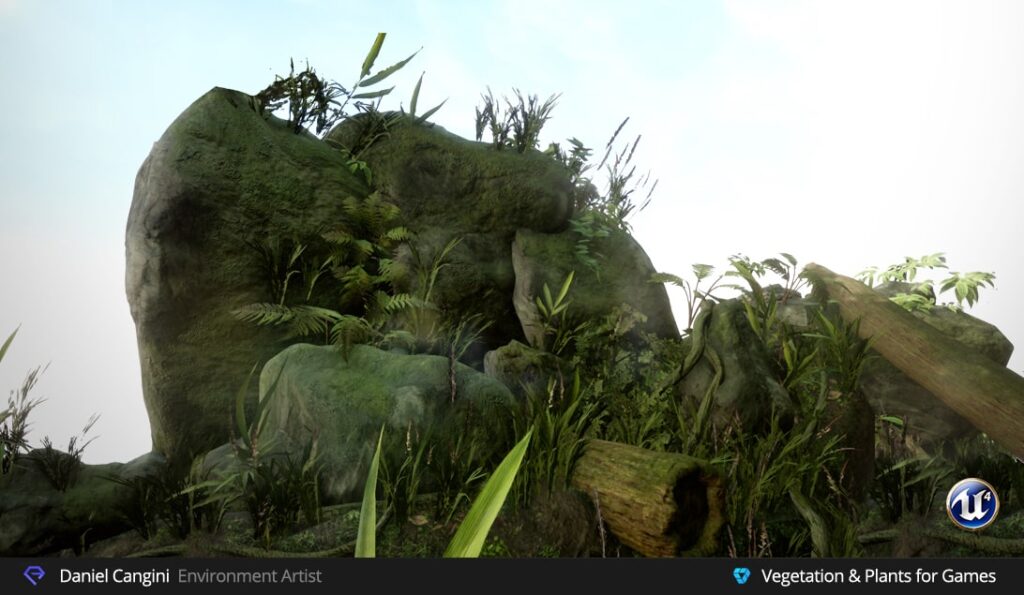
To do this, I took my main rock material and blended maps with the moss material with a Material Function.
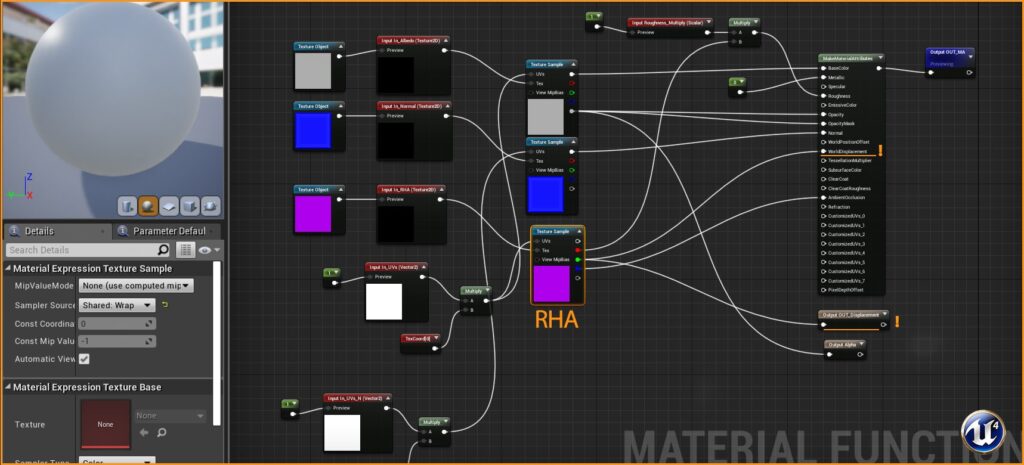
Then I instanced the Material Function in the main Master Material.
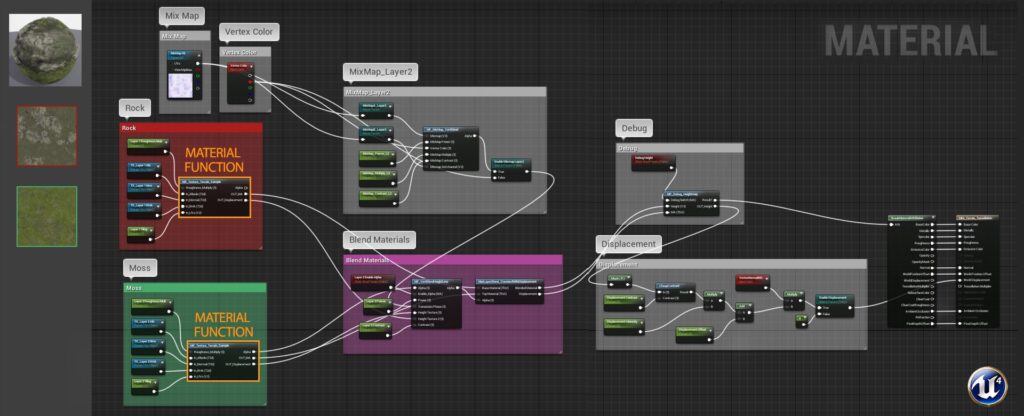
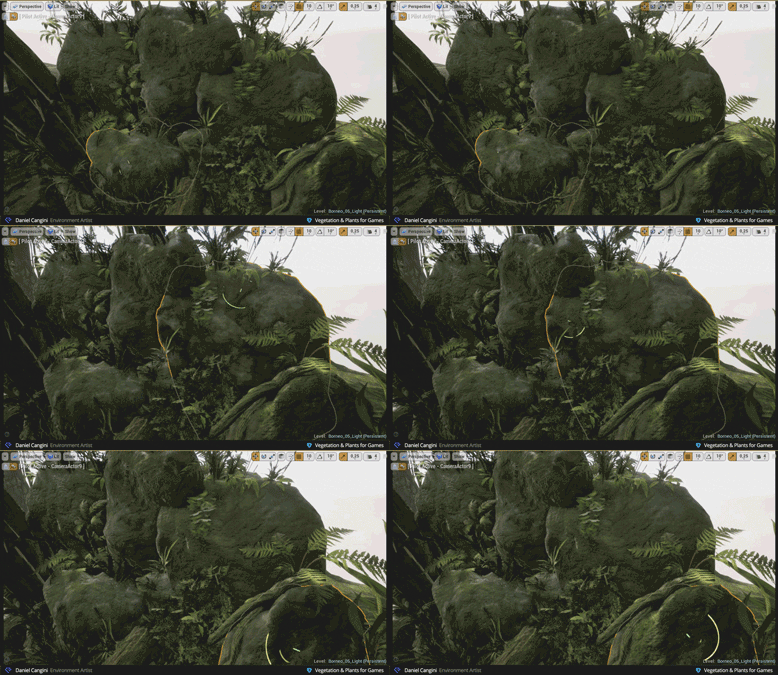
The moss part of the shader was blended in through vertex paint with the Height. I also created a transition mask that allowed me to have a slightly different value of the color for the edges of the moss.
Trees
It was my first experience creating trees and foliage using ZBrush. In 3ds Max, I created simple trees, branches with leaves, and the base stones to fill the scene.

After that, I started making trees and roots. I made the trunks inside 3ds Max and when they were finished I started to create the canopy. When making meshes in 3ds Max, I try to minimize unused texture space on geometry for optimization purpose.
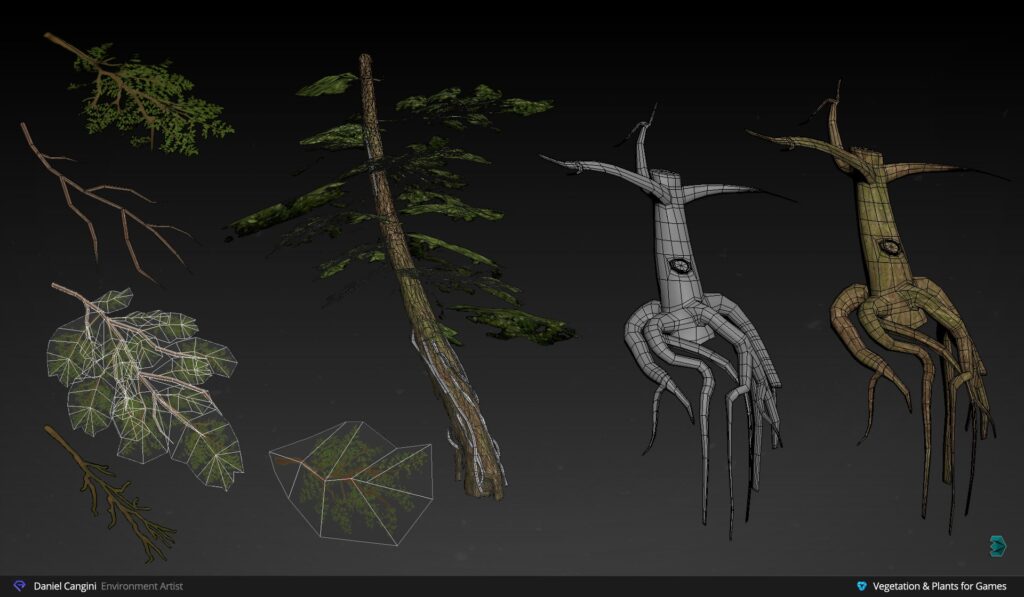
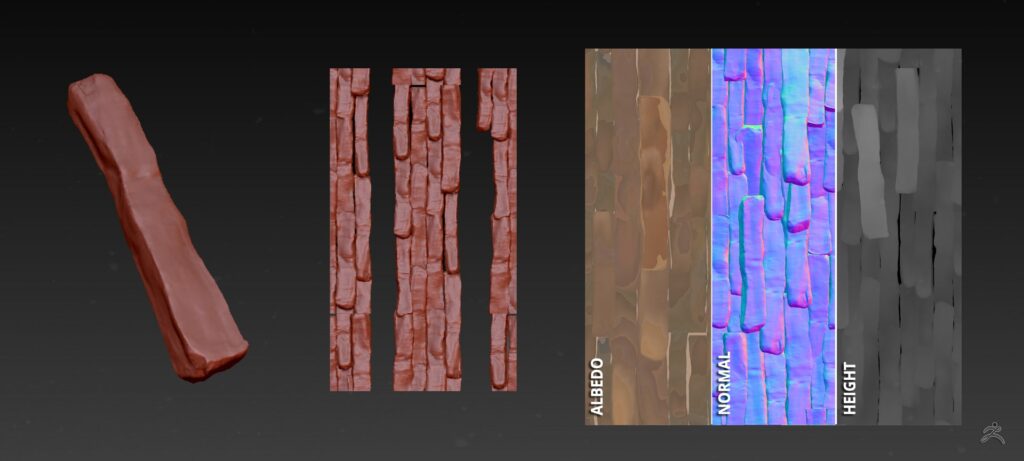
Next step was to create the Bark tile texture in ZBrush. I use the Grabdoc feature to get snapshots of my Albedo, Normal, and Height that I can take into Substance Designer to have PBR maps result.
Other Substance Materials
Here are some of the materials in the scene:
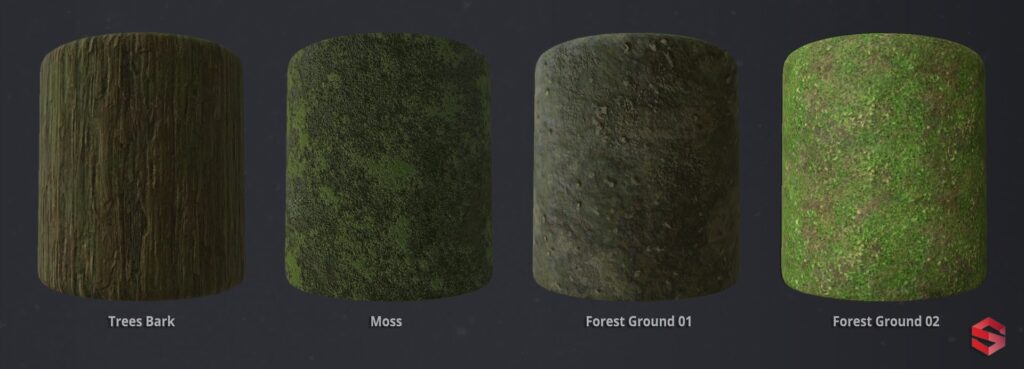
Here are the basic guidelines that I follow when working with Substance:
- Height map: I start with large forms and work to smaller details
- Roughness map: This map is really important. I use the heightmap to get a basic material separation. There are many fine details that are not in the height or normal map that I will add.
I learned a lot from Substance Designer artists who share their work. I recommend those who want to get better at Substance Designer to check them:
Plants & Foliage
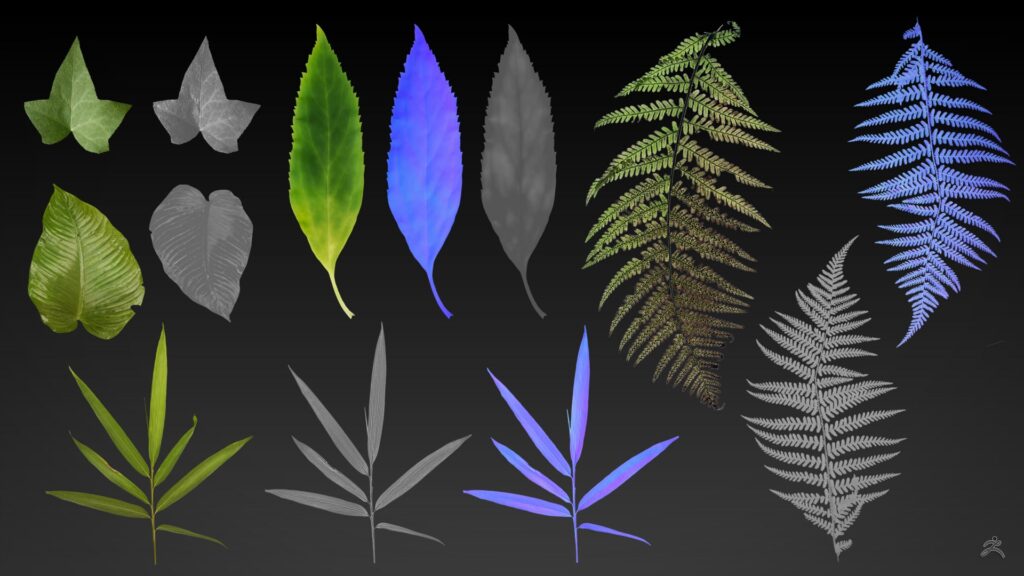
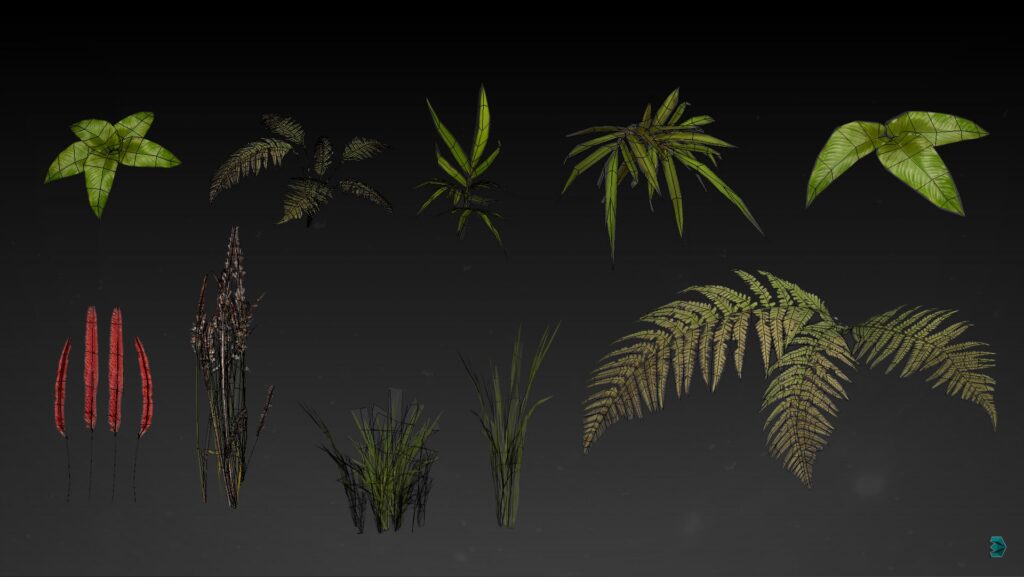
I started the canopy with sculpting and painting single leaves inside ZBrush. After that, I tweaked every leaf and brought more variation to the color. The brushes used for plant sculpting are Trim Dynamic, Dam Standard, Orb’s Extreme Polish, Pinch, and Crumple. And with Grabdoc I get albedo, normal and opacity textures resolution 2k.
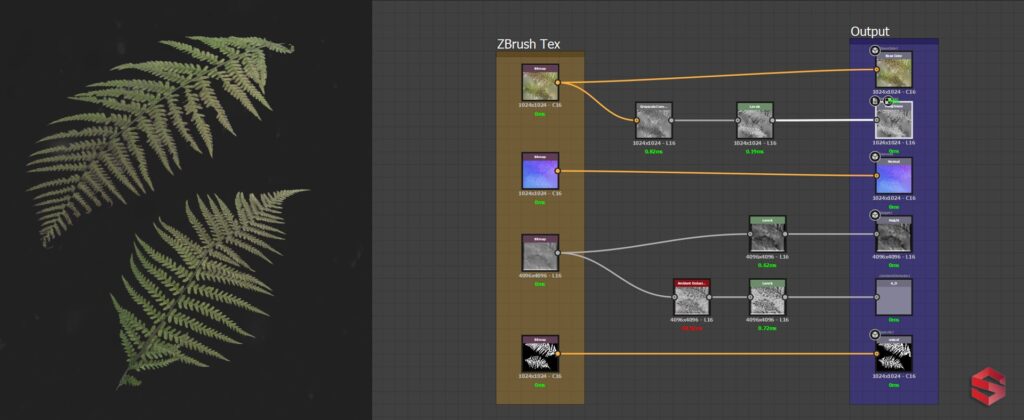
The next step in Designer was pretty quick. The biggest thing was to generate the roughness and A.O maps there. For the roughness, I used the Grayscale conversion node to isolate colors from the Albedo map with little Levels tweaks.
After the textures were finished, I went into 3ds Max and placed them on planes with preserved UVs on.
In Unreal, I used two-sided foliage as the shading model.
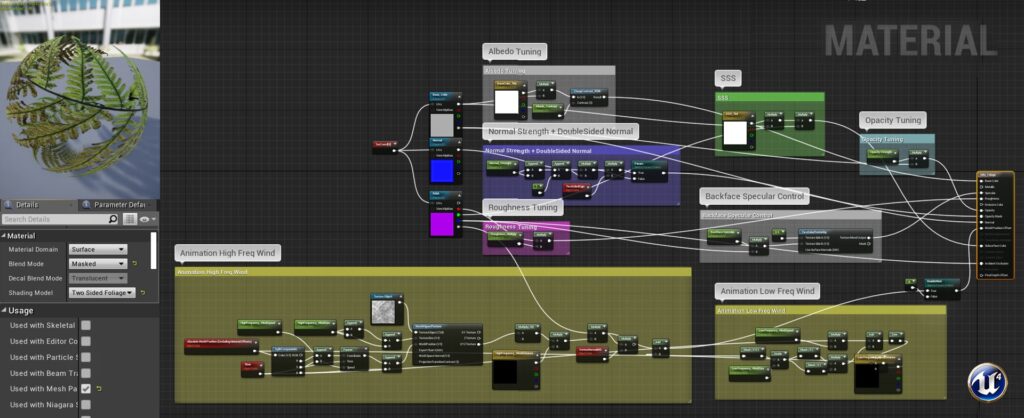
I have a Foliage Master Material that’s set up for the usual textures as well as has options for Base Color Tint, Subsurface Tint, Color Variation, Opacity, Normal Intensity, and Wind Speed/Intensity.
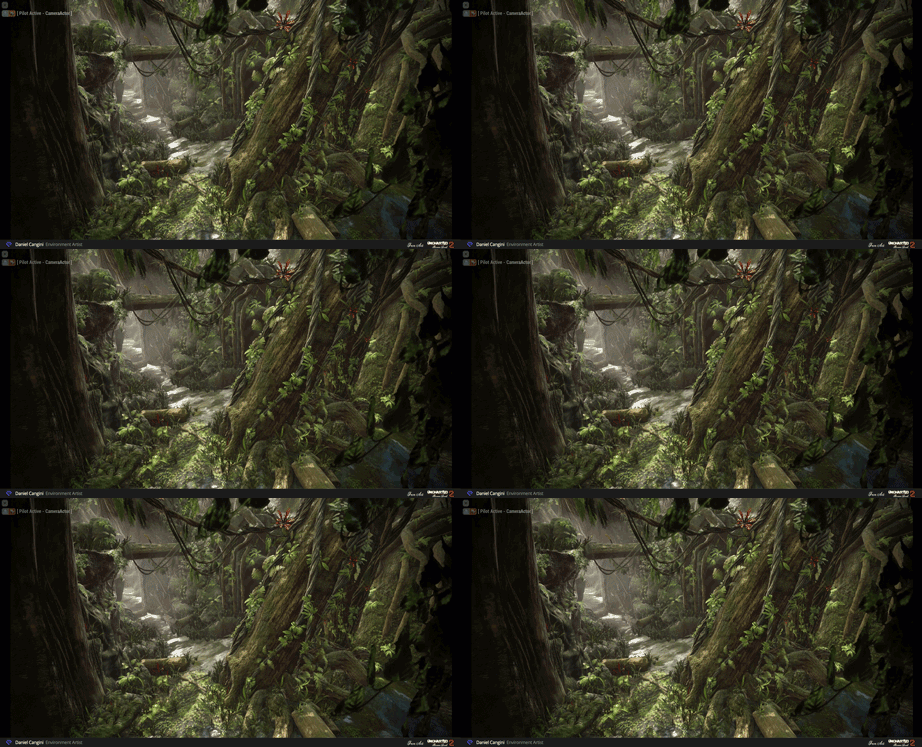
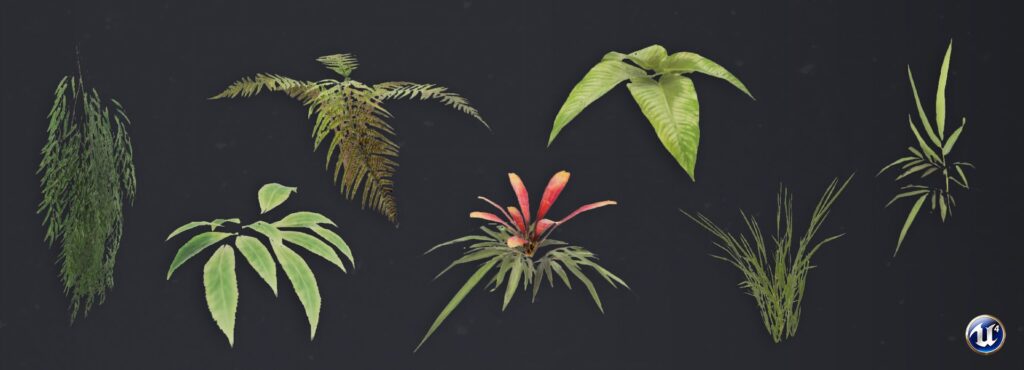
Finally, I create instances of this material for each plant and just plug in the appropriate textures.
Terrain Materials – (Material Layer)
As I’ve mentioned above, the terrain shader material was learned during CGMA’s Texturing and Shading for Games course. I started creating the terrain master material to use the vertex paint, modulate that blending and add some features such as parallax and wetness. My shader came out a bit expensive, but since I wanted to do it nicely and learn as much as possible, I limited tessellation with the camera view which helped to improve the performance.
With the use of the Vertex painting, I decided in which areas were the mud, grass leaves, and puddles would appear.
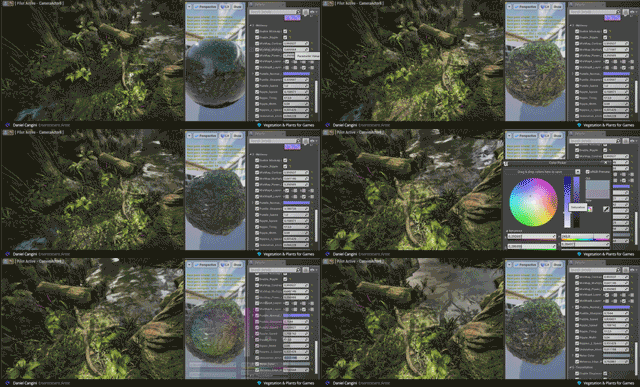
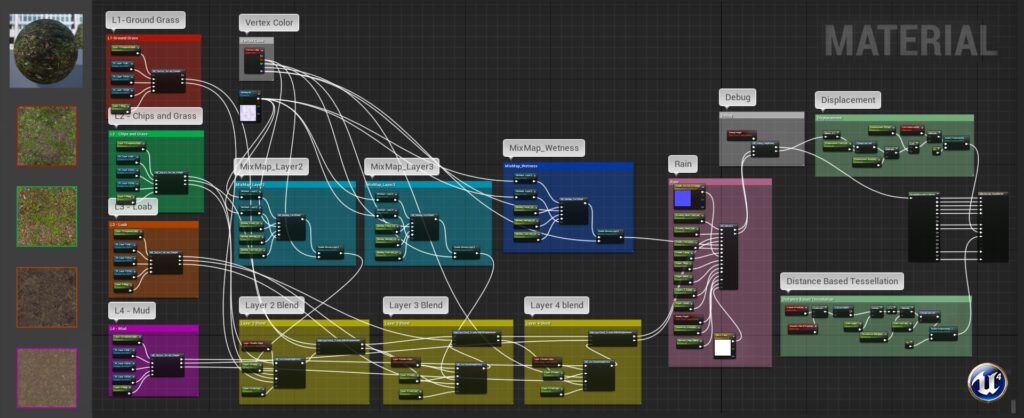
I used vertex paint in combination with additional mix maps and masks to add puddles. I made puddles as a translucent material with effect parameters to set the sharpness, ripple speed, tiling, etc.
- Layer 1: Ground Grass
- Layer 2: Chips & Grass
- Layer 3: Loab
- Layer 4: Mud
- Mask: Puddles
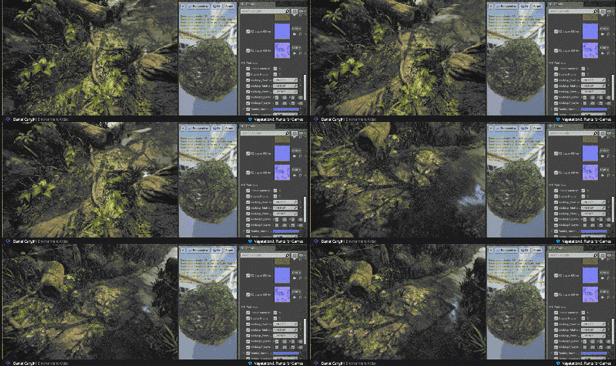
Here is a tutorial series to create a Landscape Material that features advanced heightmap blends, tessellation, and procedural puddles:
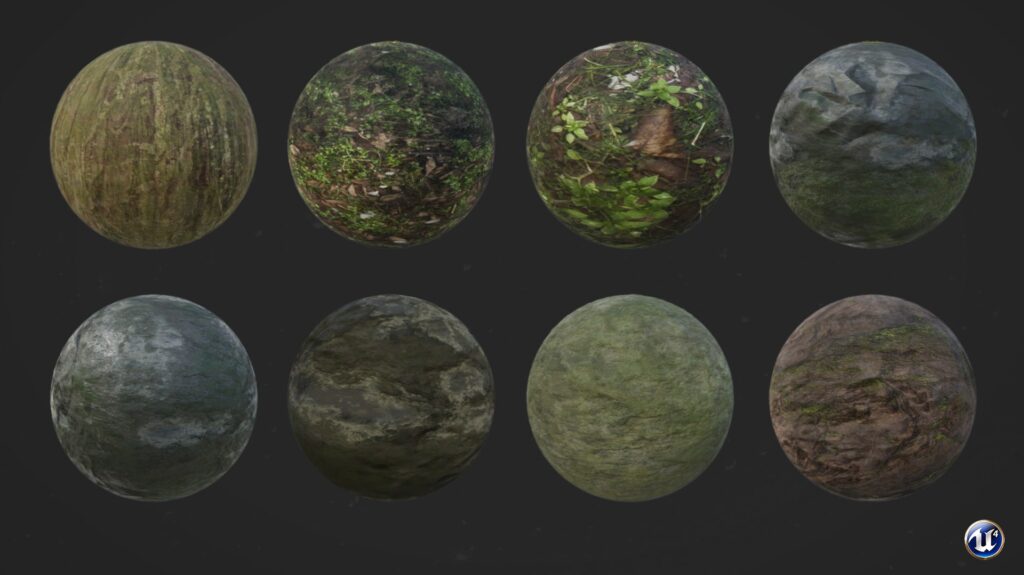
And here are my other materials in UE4:
Populating the Scene
Generally, by the time I start populating the scene, I have a rough blockout from 3ds Max where the important assets like block, rocks, and trees are placed.
At this stage, I also begin thinking about the lighting and adjusting the composition.
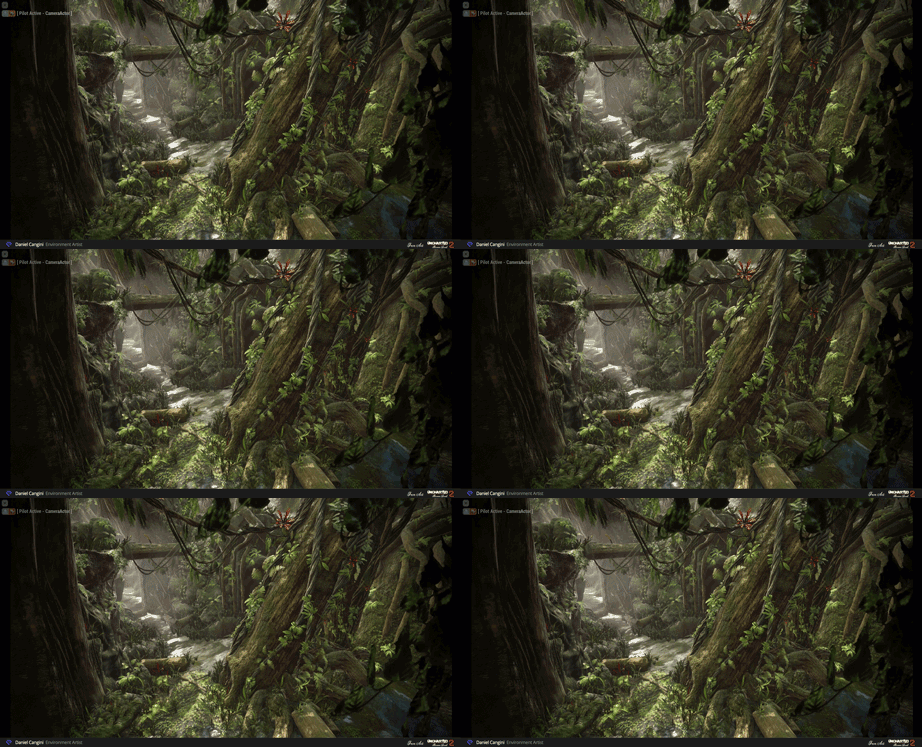
Lighting & Finishing Touches
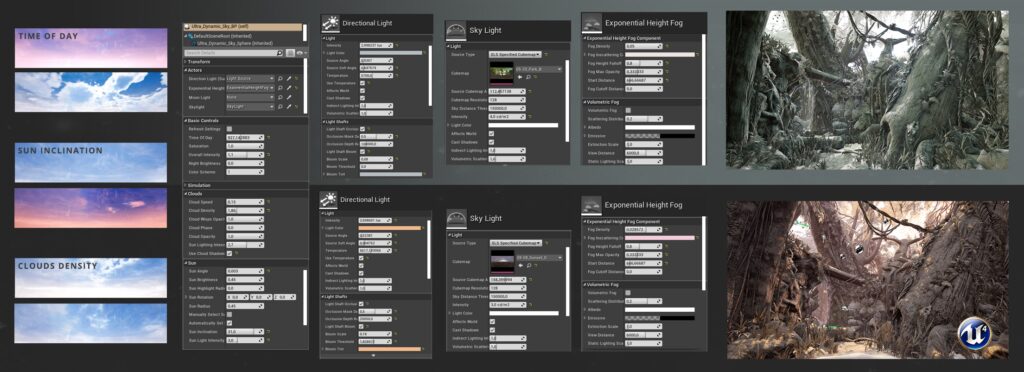
For lighting, I used Ultra Dynamic Sky Plugin by Everett Gunther which is a flexible dynamic sky system with natural cloud motion, customizable sun, moon, and stars.
The Level has a basic sky sphere, directional light, skylight, and exponential height fog. The lighting in the scene is Moveable, with baked shadows.
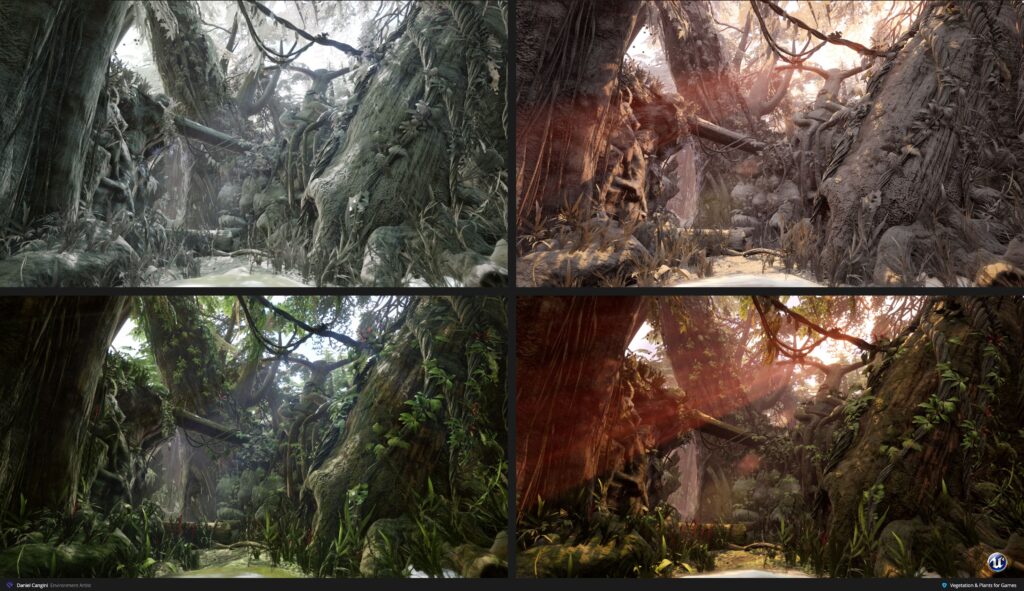
The best thing about Ultra Dynamic Sky is that you have a physical dynamic sky system in UE4 with a dynamic, flexible, customizable, and user-friendly weather system.
You can customize it using such setting as:
- Latitude/longitude-based sun study function (easy-to-use 24h clock)
- Weather effect (rain/storm/snow)
- HDRIs support
Here you can see the Day and Afternoon settings used for my level:
This is a very useful tutorial that helps to set Ultra Dynamic Sky in UE4:
Feedback & Challenges
One of the biggest challenges for me was to learn ZBrush and Substance Designer to finalize my material. Jeremy did a great job teaching the basics and demonstrating the possibilities of these fantastic programs, and Kurt taught the most important rules in creating the materials in UE4.
Overall, my experience with classes at CGMA has been amazing. I found Jeremy’s course to be very helpful. I tried all the techniques he showed us and I feel that I really improved my organic sculpting skills in a few short weeks.
I also had a great experience during the Texturing and Shading for Games course with Kurt Kupser, who gave me important feedback, comments and helped to learn how to create amazing materials in UE4.
