6 Steps to Create a Realistic 3D Character: Mursi Man
If you're looking for a breakdown of how to create a photorealistic 3D character, you can't go wrong with Deigo Rodriguez's Mursi man. Diego's workflow reveals details and techniques that any artist can learn from, regardless of level.
- Reference and Blockout
- Sculpting the Body
- Texturing the Skin
- Modeling the Assets
- Texturing the Assets
- Lighting and Rendering
 My name is Diego Rodriguez, I’m a 3D Character Artist from Spain and I’m currently building my portfolio. I want to share with you a little breakdown of the character I did for CGMA’s course Character creation for Films/Cinematics with Pete Zoppi.
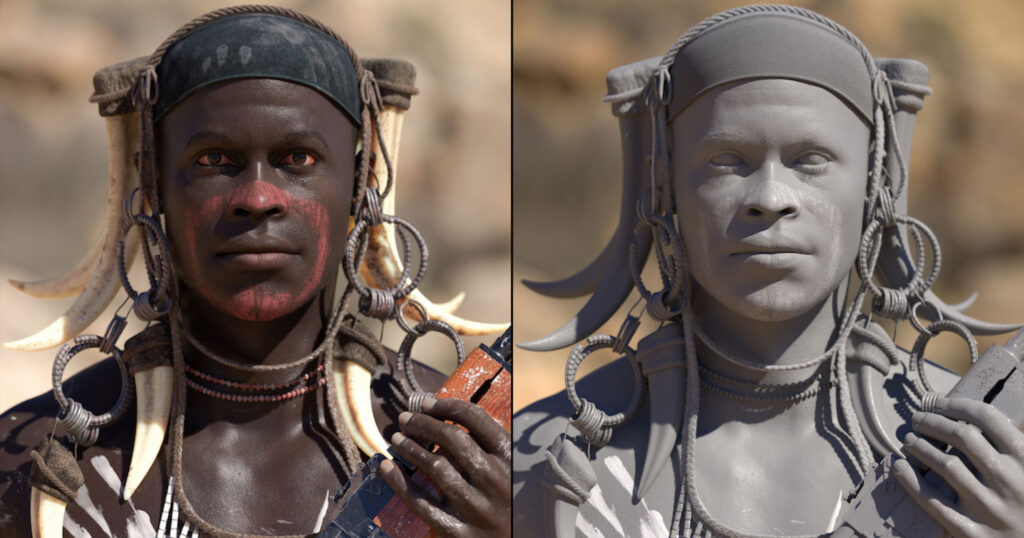
1. Reference and Blockout
I was fascinated by the Mursi tribe so I decided to base my character on them as it was a great chance to study organic sculpting, hard surface modeling, and clothing. I focused on the upper body because I wanted to have enough time during the course to complete a final render in Arnold.
In my opinion, it’s really important to spend a few hours gathering references and planning your workflow. I usually do paintovers to analyze the approaches I could take while modeling. This helps to save some time later because you're aware of challenges. I avoid human references with makeup or heavily edited because they can lead to confusion while sculpting the shapes.
For clothes, I tried to find sewing patterns similar to the pieces I needed to model. It’s much easier to use them in Marvelous Designer instead of doing it by trial and error. I use Pureref to group my references into high-resolution images so I can easily navigate through them while working on the character.
One of the first things I learned in the course was the importance of creating a blockout of your character. Even though I did a very quick blockout, it helped me quite a lot in the next stages because I already knew how I wanted to position the assets.
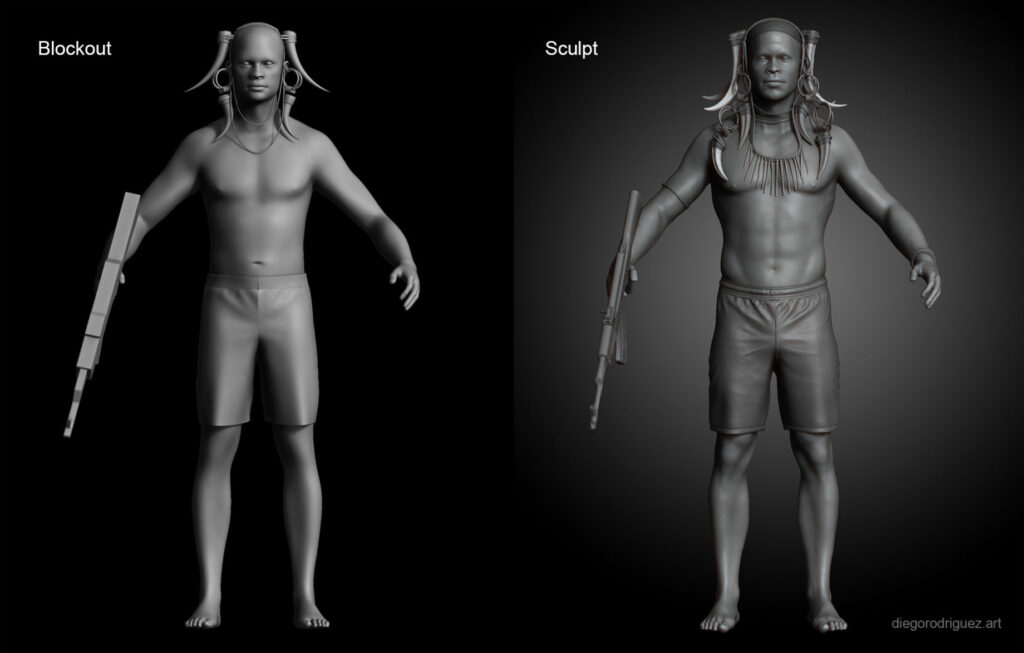
2. Sculpting the Body
I started with a base mesh in Zbrush. I tried to keep the mesh as low as possible because I‘m constantly changing forms with Move Brush. For sculpting, I used ClayBuildup, ClayTubes, and the alternative smooth brush with low intensity to create subtle organic shapes like muscles or landmarks.
Sometimes I like to break the shapes a little by using Surface Noise, baking everything on a layer so I can change the opacity later. I keep it very subtle, just enough to create an organic feel.

Through the first classes, I learned to test my early sculpts with a skin shader to see how it works as the shapes may be softened in the render and it’s very easy to modify the sculpt at this stage.
Looking to focus your skills on the face? Check out CGMA course Character Facial Sculpting.
3. Texturing the Skin
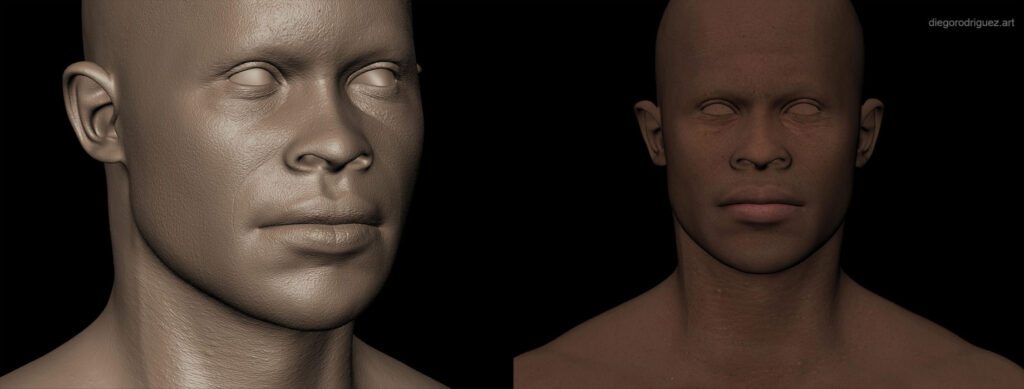
I’ve used texturing xyz maps for the skin, it’s incredible the amount of detail you can get from them. I learned how to project them in Mudbox and how to use “Sculpt using maps” to create different layers for the secondary and tertiary details. This way, it’s easy to modify the intensity through the opacity or through the amplify, mask, and smooth brushes.
When the displacement was ready, I used a combination of polarized maps and hand painting to create the base color for the skin. I also used the displacement information to darken the pores.
I created the war paint in Substance Painter. Even though it’s not the best option for UDIMs, it’s very easy to create this kind of texture. I exported a high subdivision level from the sculpt in fbx format into painter and I baked the maps so I was able to use smart masks and materials. After that, I created a paint texture with some color variation and in this group, I used a black mask with fill and paint layers to mask the zones I wanted the paint to be on. You can export this mask to use later in the shaders.
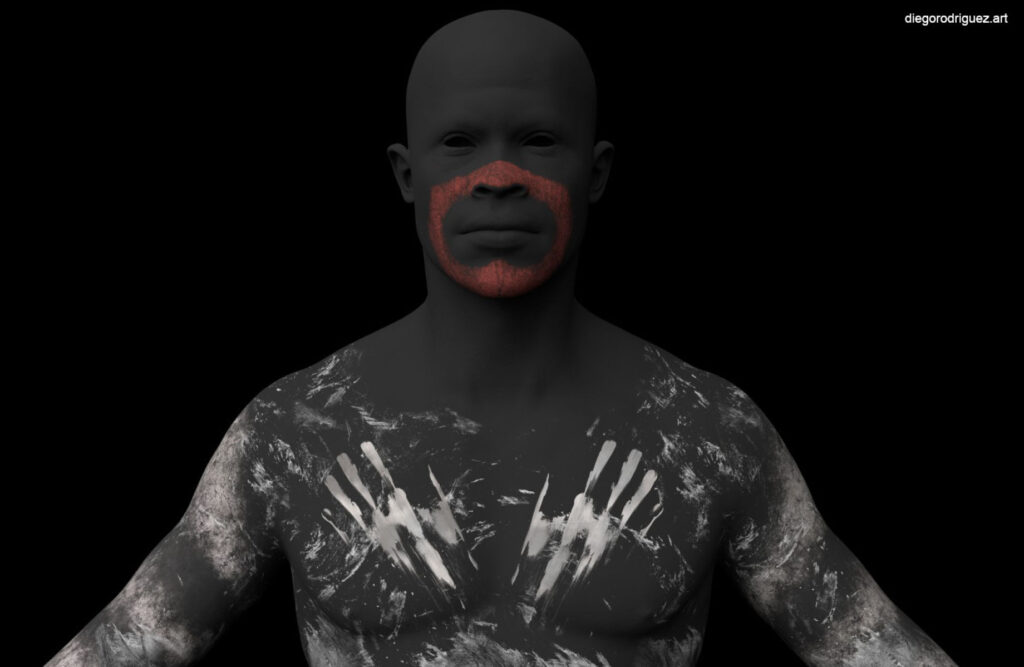
With all the maps ready I created two shaders, one for the skin and another one for the paint. I used the Mix shader with the mask exported from Substance Painter to blend both of them.
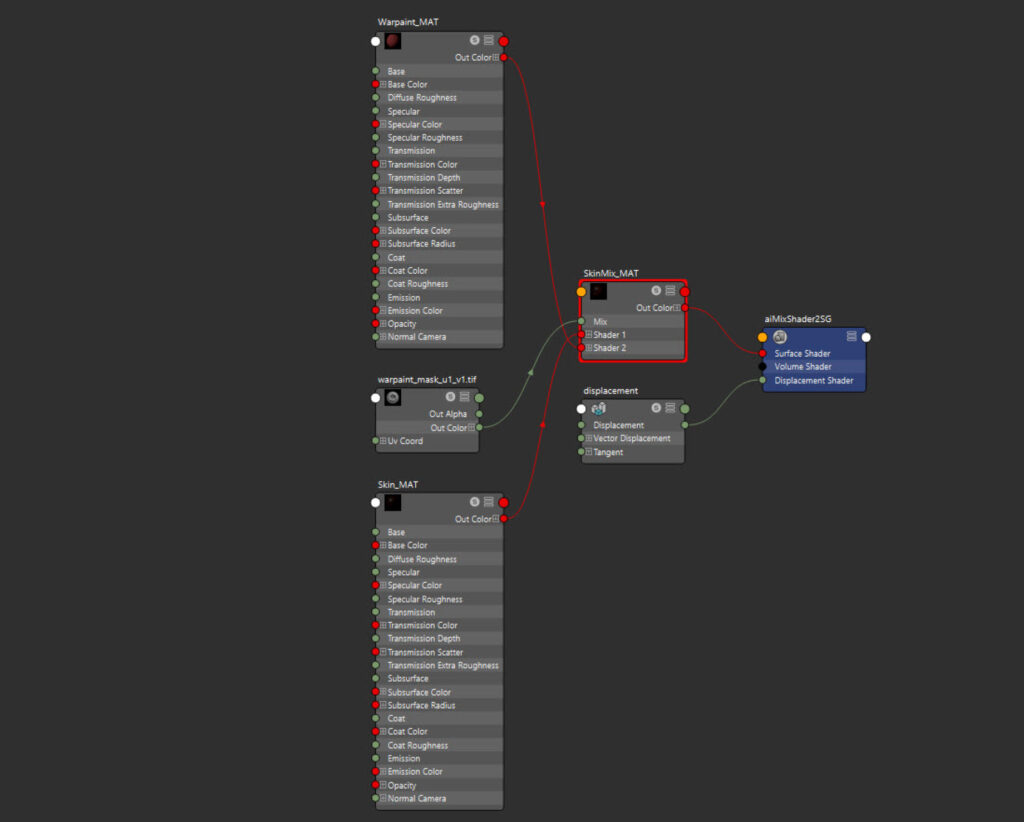
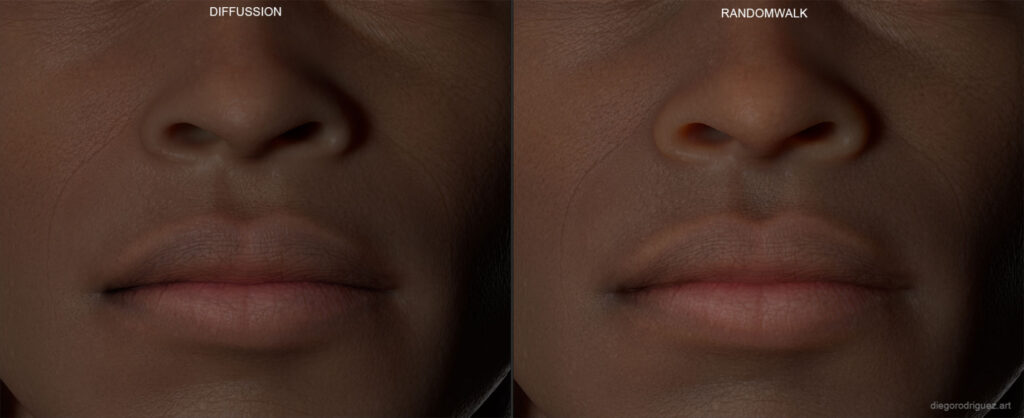
Creating the skin was very challenging for me and thanks to the feedback Pete gave to me I was able to achieve a nice result. I needed various attempts until I was happy with the pore detailing and I also did some tests comparing the default Subsurface with the new randomwalk setting.
4. Modeling the Assets
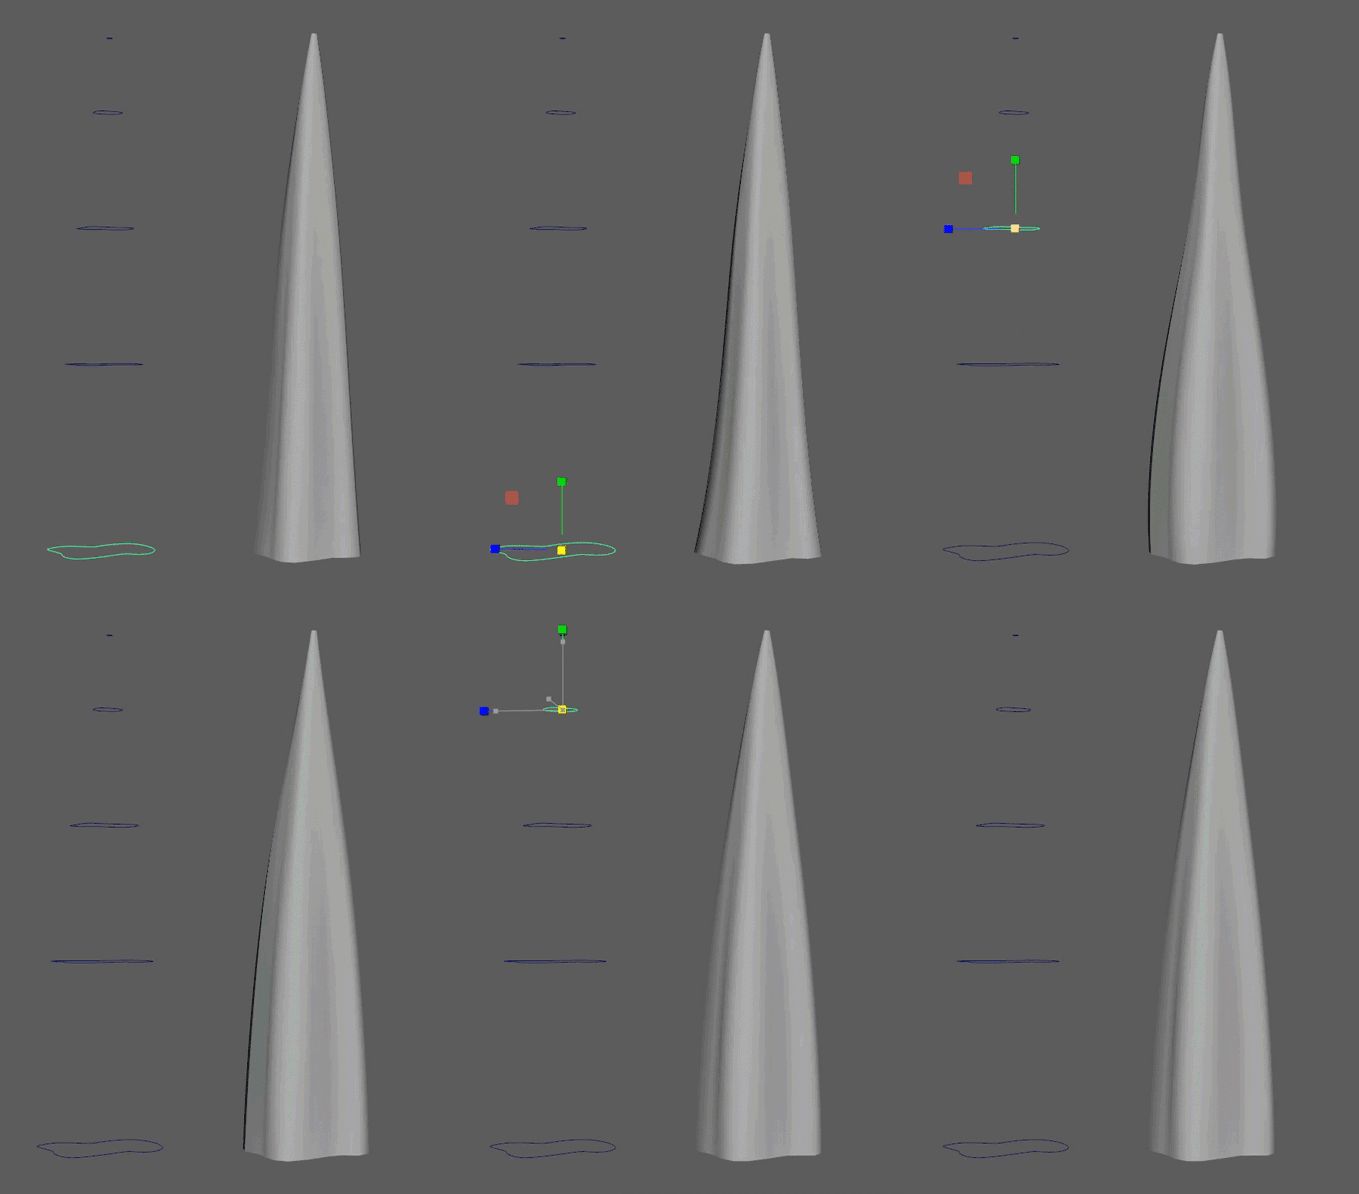
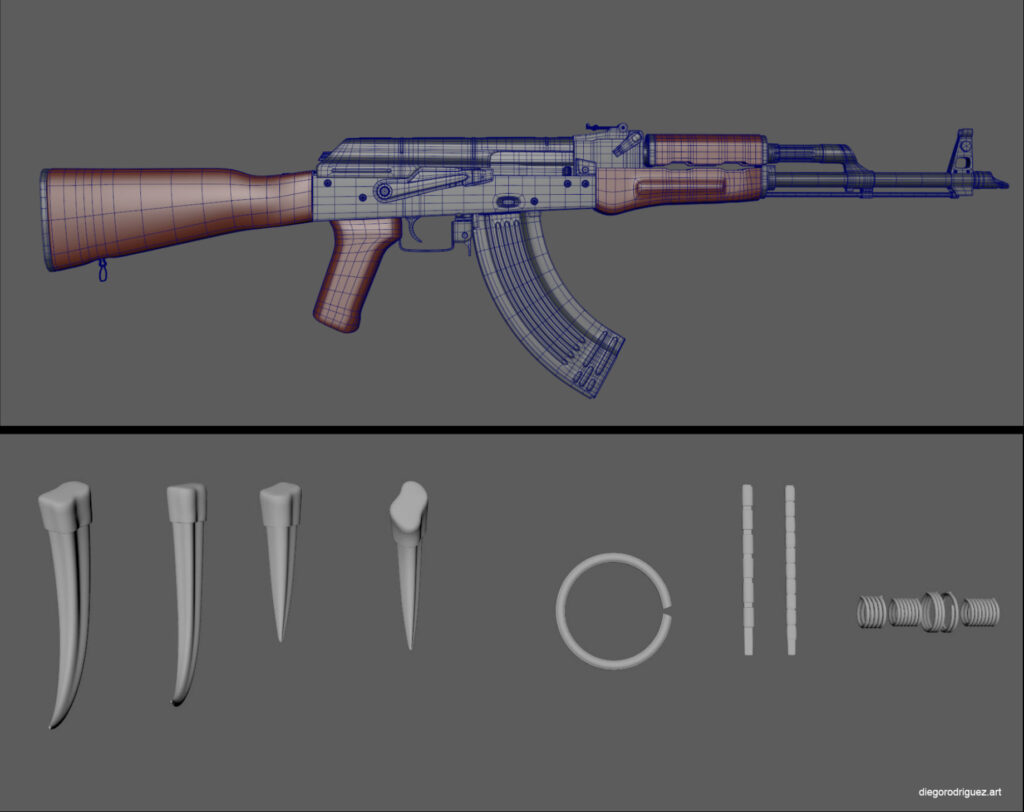
At this stage, it’s very important to have good references as it can save you a lot of work. For example, I found a tusk section that was very useful to create the horns. I traced the section in Maya using Curve tool and I used Loft to create the model. The best part of this workflow is that you can use the history to generate horns with different shapes very quickly. Finally, I used a bend modifier to create the final curved shape of the horn.
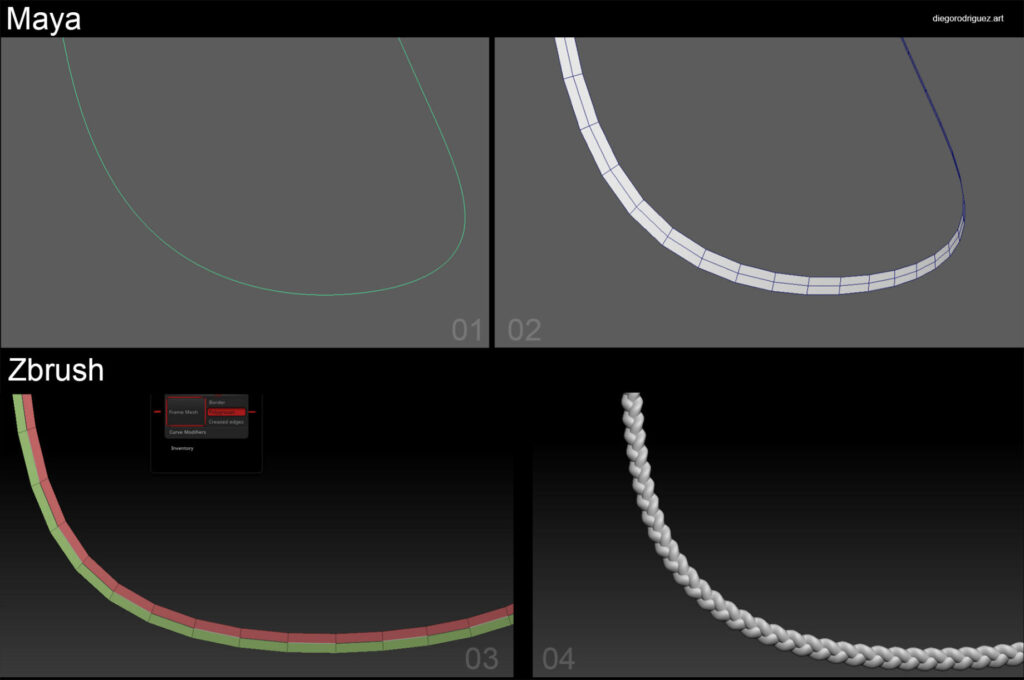
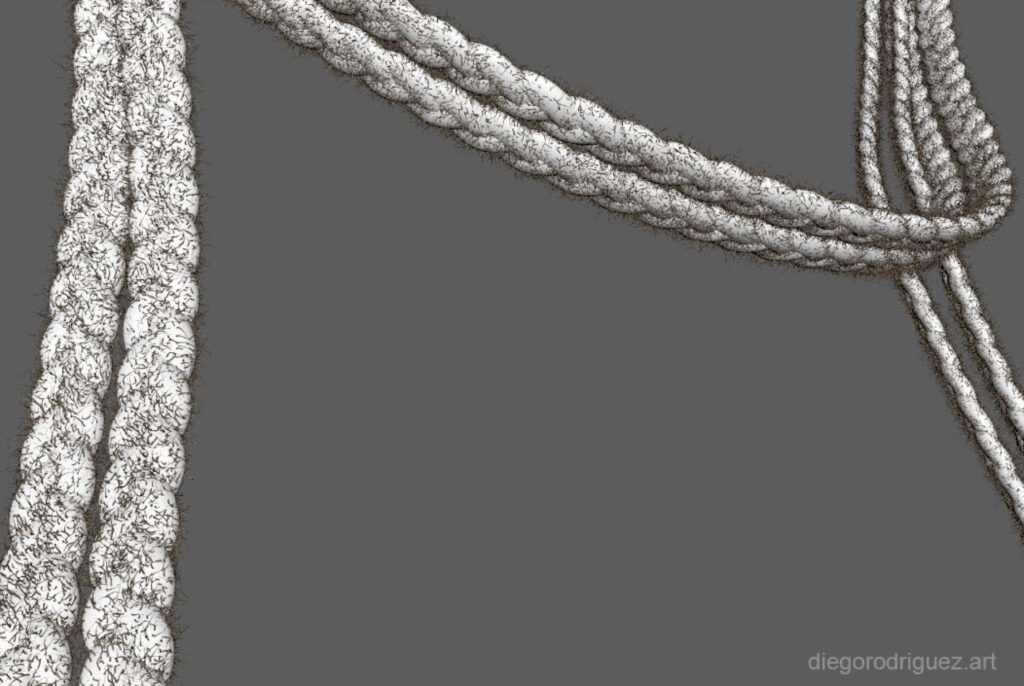
I chose to use curves for the ropes. I positioned the curve in Maya and I extruded it using a plane.
It’s important that the geometry has an edge loop running through the center. Then I exported the mesh into ZBrush where I created two polygroups so I could use Frame mesh to select the central edge loop. Finally, using an IMM brush I created the rope.
To break the edges I did an XGen pass with small and thin hairs using noise modifiers.
For complex models like the AK, I always try to find references from different angles to use them in Maya. I start with basic geometry like cubes or cylinders and then I use Multi-Cut, Extrude, Bridge, etc to create the details. I went pretty high poly because I already knew it was going to be close to the camera in the final shot.
If you're looking for an in-depth breakdown of 3D weapons, read "6 Steps to Create Weapons for Games: 1 Process for 2 Guns."
5. Texturing the Assets
I exported high-resolution meshes into Substance Painter using FBX format and I baked the maps I needed to start using smart masks. You have to be careful using UDIMs in this software so it’s important to be organized with the UVs. I decided to group them based on materials.
I really enjoyed this stage because it’s very fun to create clean materials and start adding dirt, scratches, edge wear, etc. I learned that it’s important to think about how the objects were made and the abuse they went through so I could achieve more realism. I also added white paint to some of the assets because the body and the hands of my character were covered in paint.
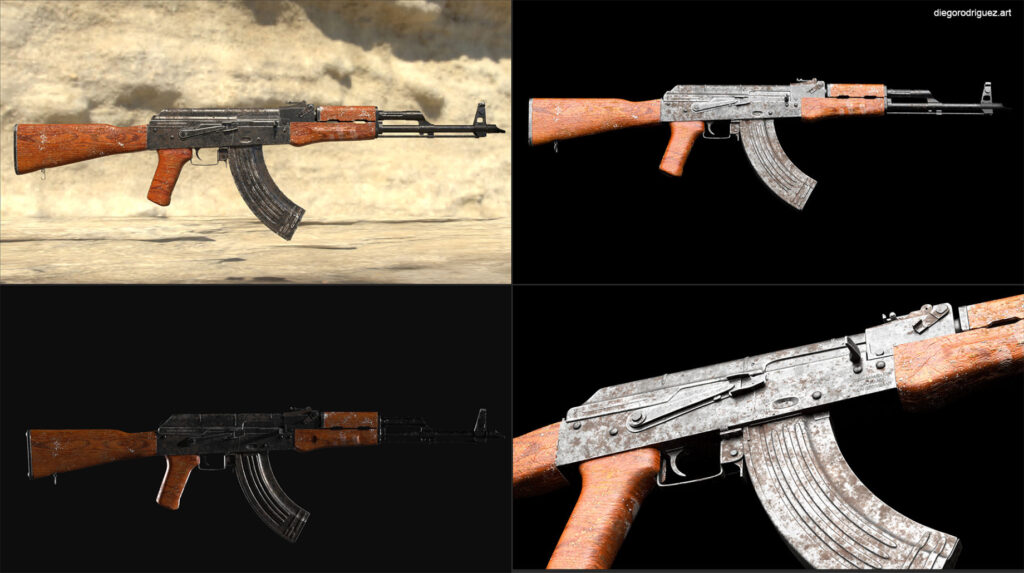
Substance Source has really nice materials you can use as a base for your own textures. For example, I’ve used the rifle stock material in the AK.
6. Lighting and Render
I spent a lot of time trying different lighting setups to see how everything was working. I usually try to avoid front lights as much as possible as they tend to create plain shapes. On the other hand, side lights emphasize the shapes of your model and can create more interesting compositions.
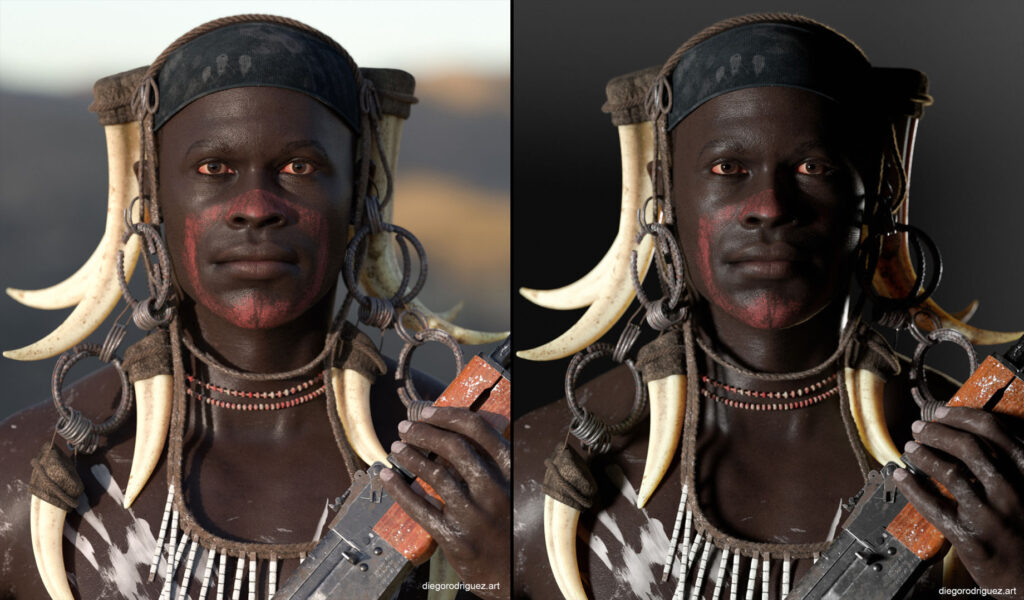
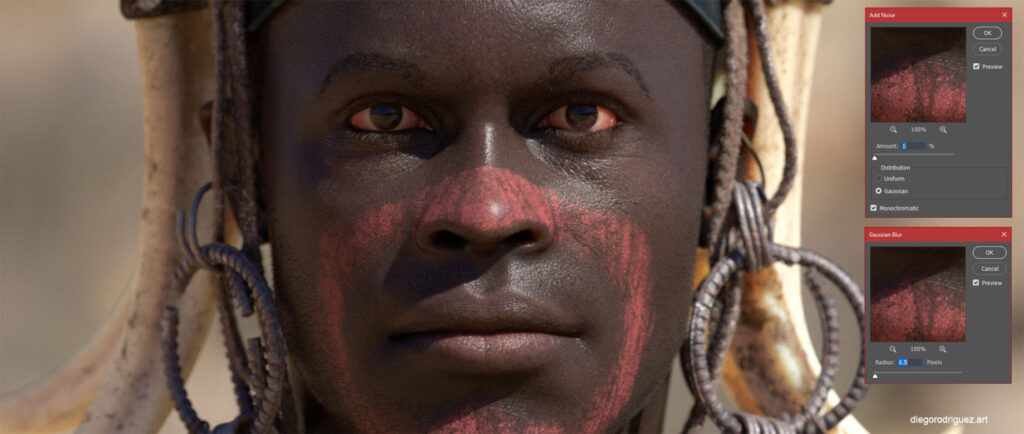
I edited the final render in Photoshop using Camera RAW where I overexposed the image a little bit using the highlights and reduced the saturation to get a more realistic result. I also added some gaussian blur and noise to avoid the crystal clear details you get in a 3D render.
Fascinated by the impact of Diego's lighting changes? Explore CGMA course Lighting and Shading for Film Production.
Final Render

Final Thoughts
- I think the best part of this course was getting feedback from a professional artist with years of experience like Pete. Even though the weekly content was great, I got the most out of the Q&A live sessions where he did some great demonstrations in real time and answered all the questions we got. I can’t recommend it highly enough.
- I enjoyed the process of creating this character as I discovered new techniques I’ll definitely use in my workflow from now on. I hope you enjoyed this breakdown, don’t hesitate to contact me if you have any questions. You can get in touch with me through my website, Instagram (@artofdiego), or Facebook (diegorodriguez3d).
RELATED LINKS
Looking to focus your skills on the face? Check out CGMA course Character Facial Sculpting.
If you're looking for an in-depth breakdown of 3D weapons, read "6 Steps to Create Weapons for Games: 1 Process for 2 Guns."
Fascinated by the impact of Diego's lighting changes? Explore CGMA course Lighting and Shading for Film Production.
LEARN MORE
CGMA provides comprehensive instruction for Art, Games, and VFX industries in a variety of courses for a range of students, from 2D and 3D artists looking to supplement their college studies to industry professionals looking to stay up to date on emerging trends and techniques in the field.


