


How to Create a Modular Environment Design: Abandoned Soviet Warehouse
Hi everyone! My name is Vitaly Zhdanov and I am working as 3D Environment Artist at Anvio VR in Moscow. I graduated from Graphic Design Faculty of International Academy of Business and Management. For the past 7 years, I have been working as a graphic/web-designer. 3 years ago, driven by a long-held dream, I decided to move to the game industry and enrolled at the Game Art faculty in Scream School in Moscow. After a year of education, I found my first job in game industry.
In order to move forward and keep learning, I entered the CGMA class: UE4 Modular Environments taught by Clinton Crumpler, where I learned lots of interesting techniques and approaches, which I will speak of below.
References
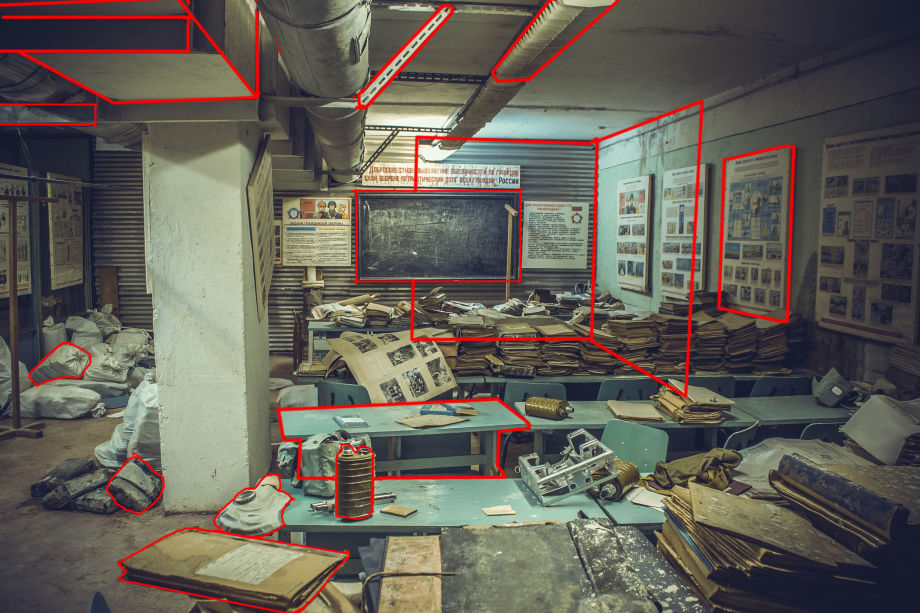
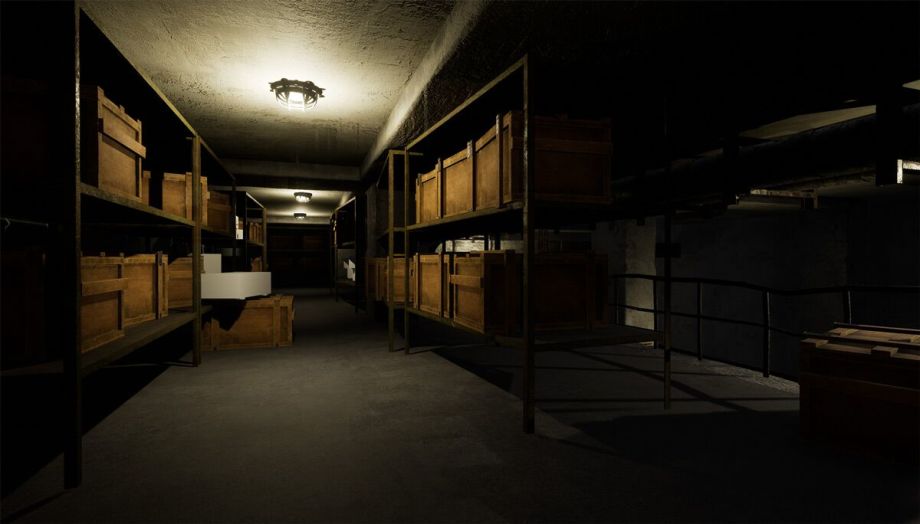
During the first week of the class, I had to define the theme of my final scene, which didn't have to be massive, but at the same time, was a big project for a 2 months class. I started with searching for ideas and references on Google and Pinterest and I was lucky to find nice photos of abandoned soviet bunker warehouse.
In those references, I got exactly what I was looking for: relatively small scene, modular elements, interesting lighting and gloomy atmosphere of abandonment.
I began to deconstruct the references, and this approach helped me decide which objects I needed and how many of them I needed. It also helped me to plan the modularity.
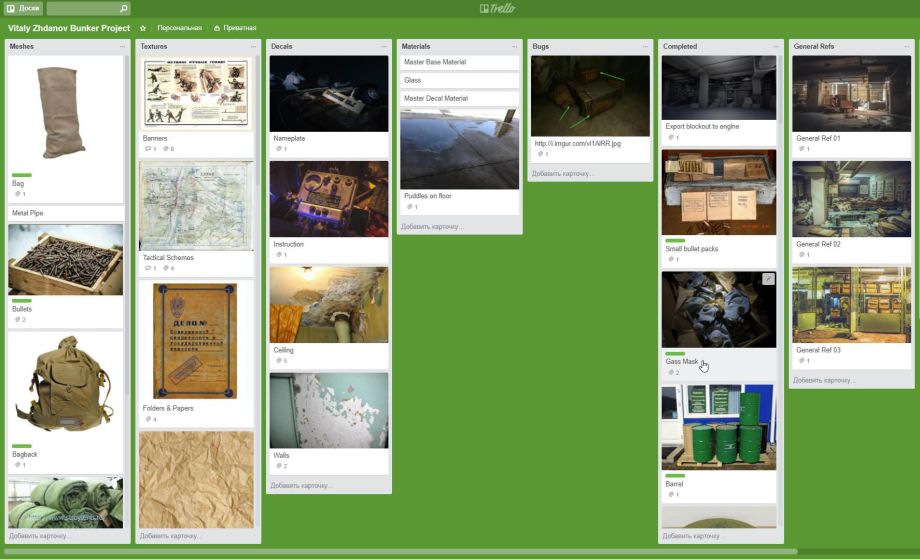
I made my Trello Board to collect different references of objects for the scene, textures, decals and materials, which I wanted to create. With help of Trello, I was able to follow the progress and control the amount of work to be done.
Blockout
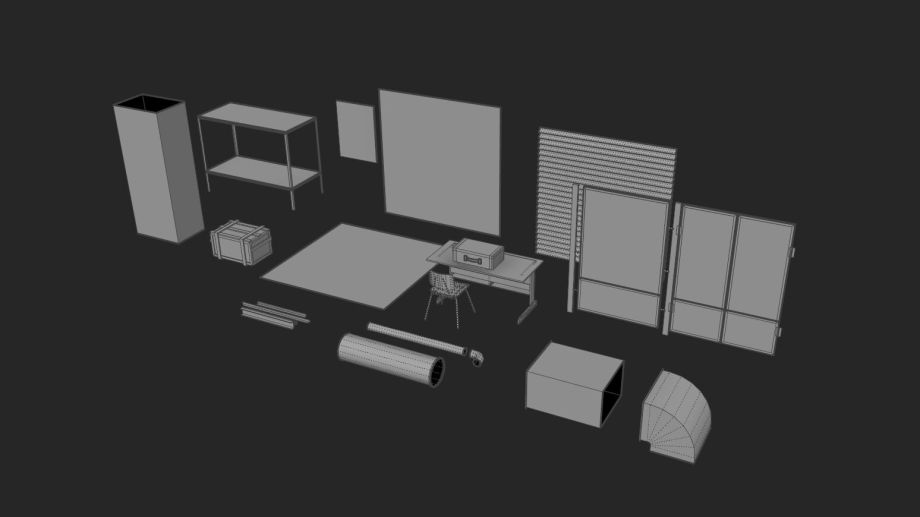
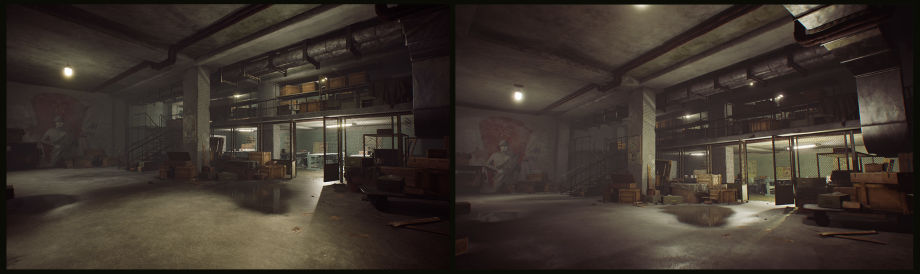
After checking my references, I made a basic blockout of large and medium objects to quickly fill the space of the whole scene. I used Maya for modeling and compiling the draft blockout, where I could easily check the connectivity of modular assets between each other.
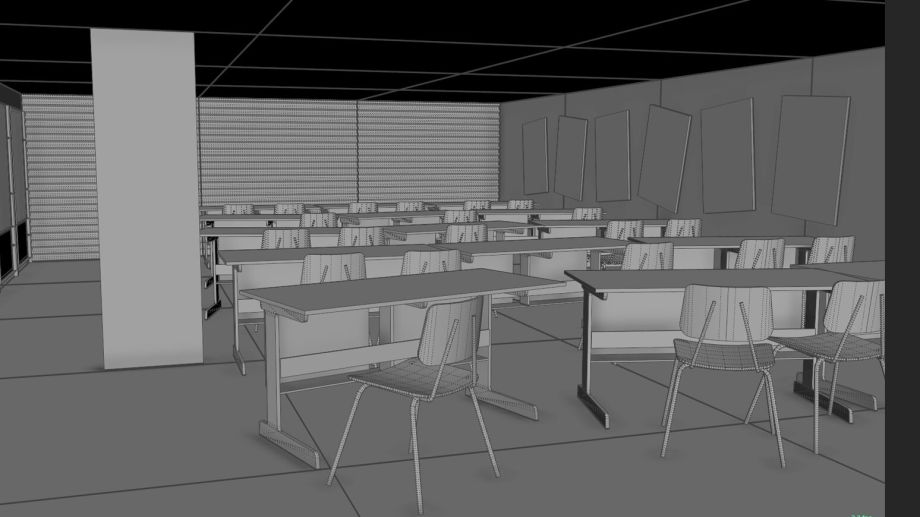
Then I imported those objects into Unreal Engine 4 and made a blockout in engine. At this stage, I realized that I could make my scene even more interesting by adding the second floor, which required some additional modular elements. During this blockout stage, I also positioned the cameras for future beauty shots.
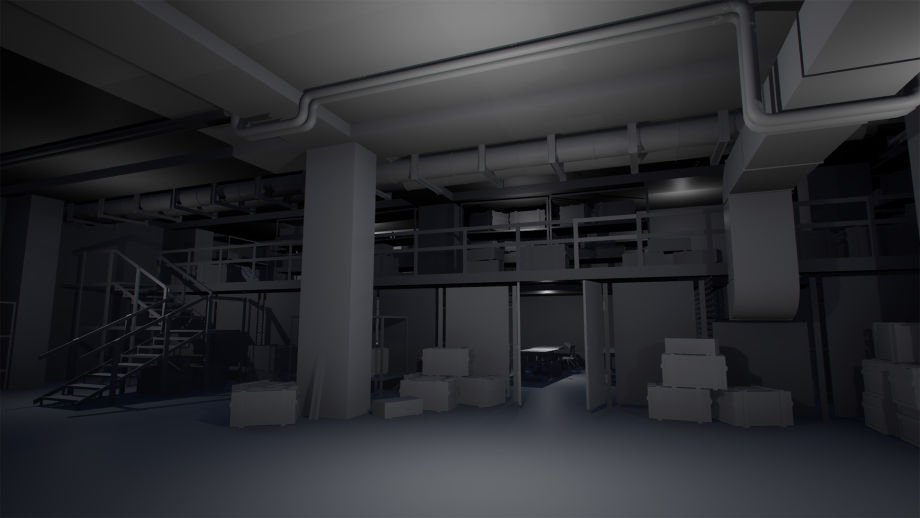

At that time, I hadn't concentrated my efforts on lighting too much, but I still placed several local light sources to better understand the overall look.
Modeling & Texturing
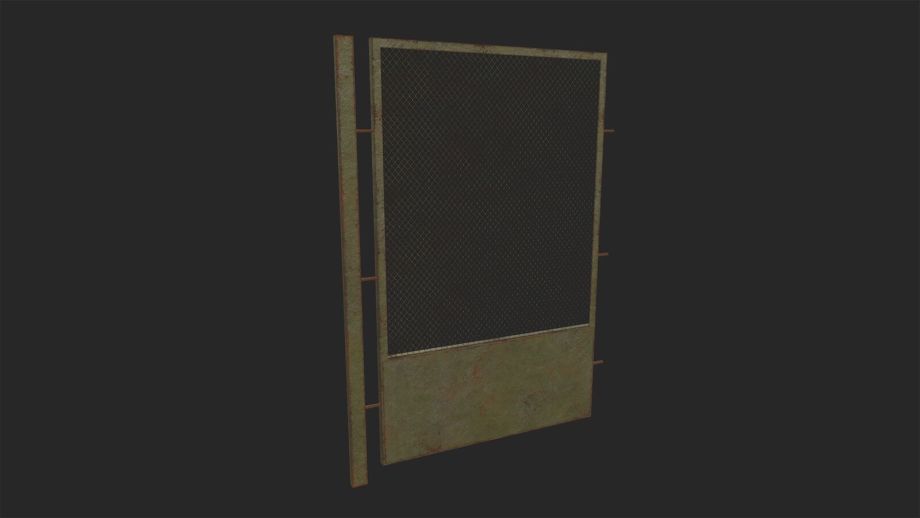
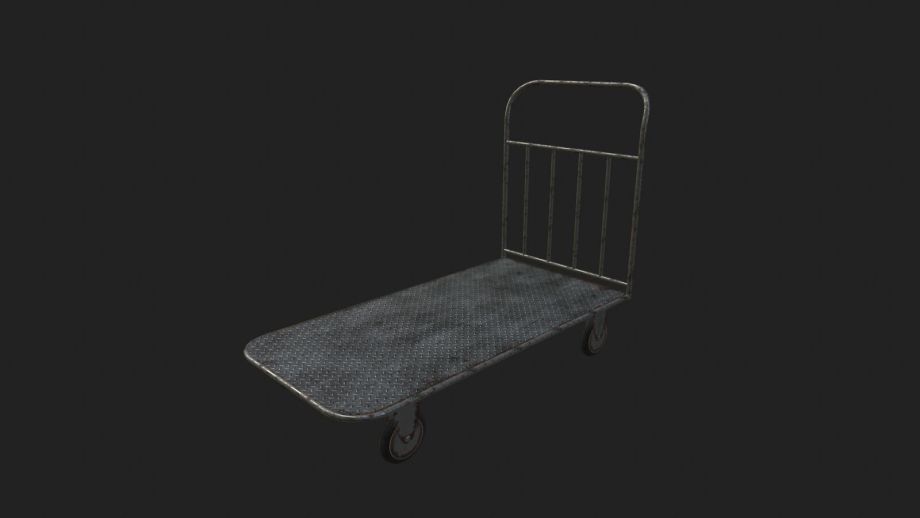
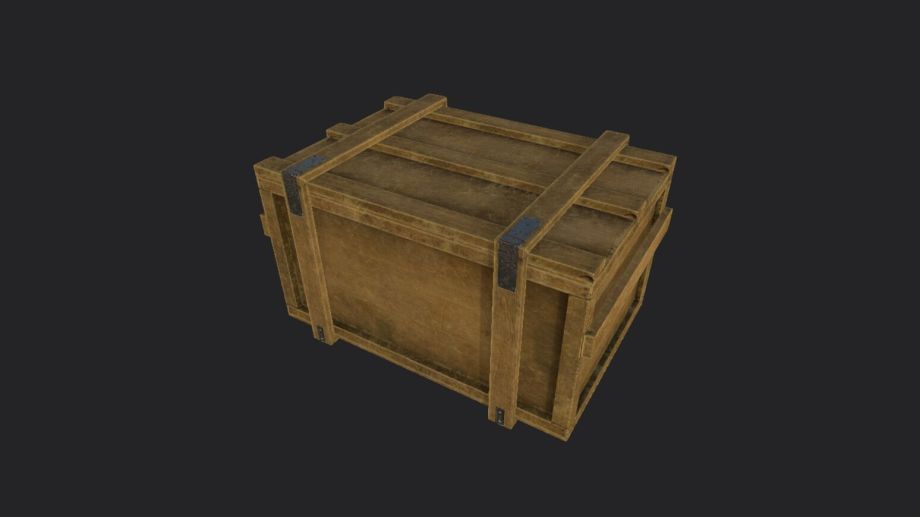
After I was satisfied with the blockout, I began model low polys and high polys of other objects and I unwrapped UVs. I tried to use trim sheets where it was possible to avoid a great number of unique textures.
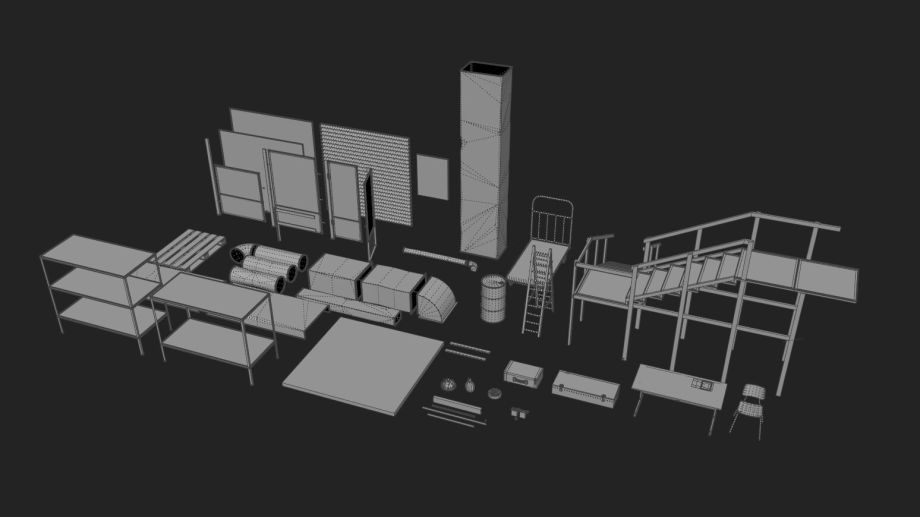
For most textures, I used Substance Painter, and because I had quite strict deadlines I used tile textures made from photos and Substance Share content. I was trying not to be obsessive with high texturing quality of each and every object because my prime goal was the quality of the whole scene's overall look. It was a relatively fast stage of the project for me and this was what I got:
I imported objects and textures into the scene and replaced the block meshes with them.
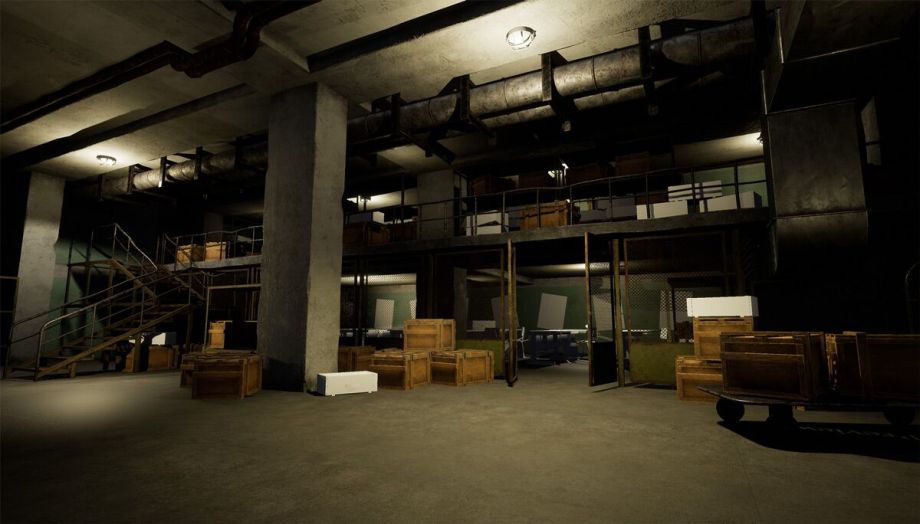
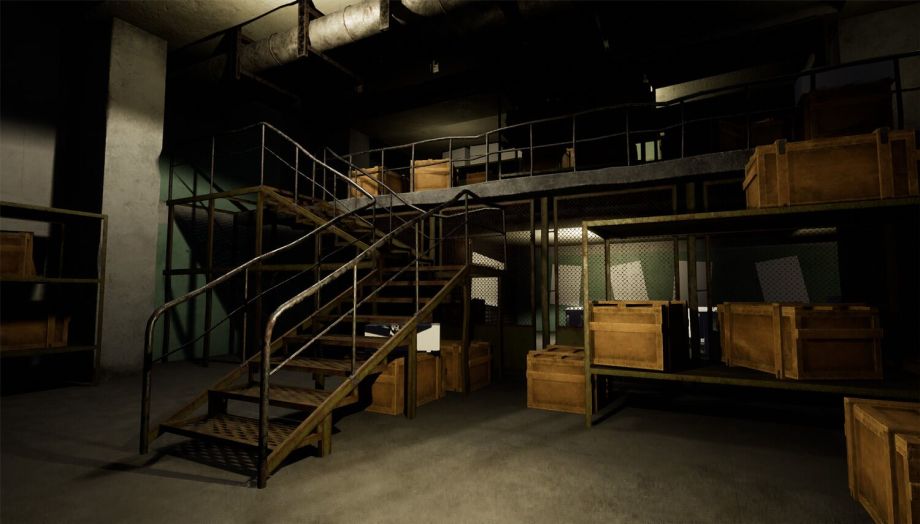
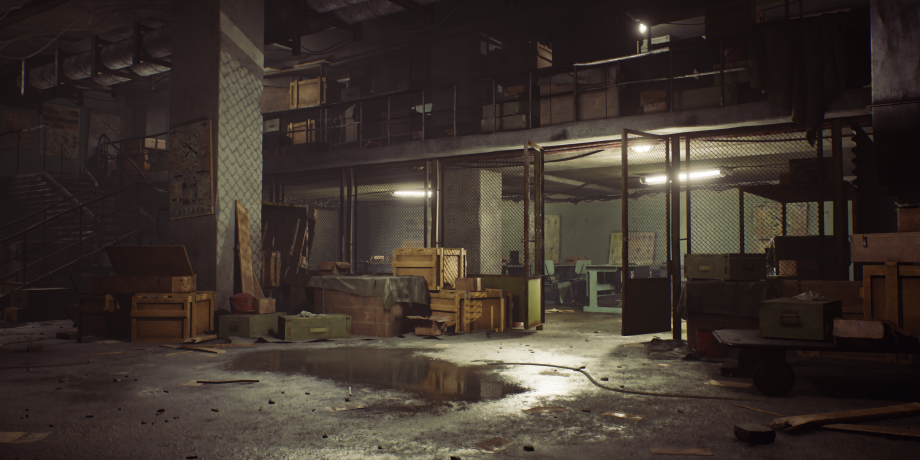
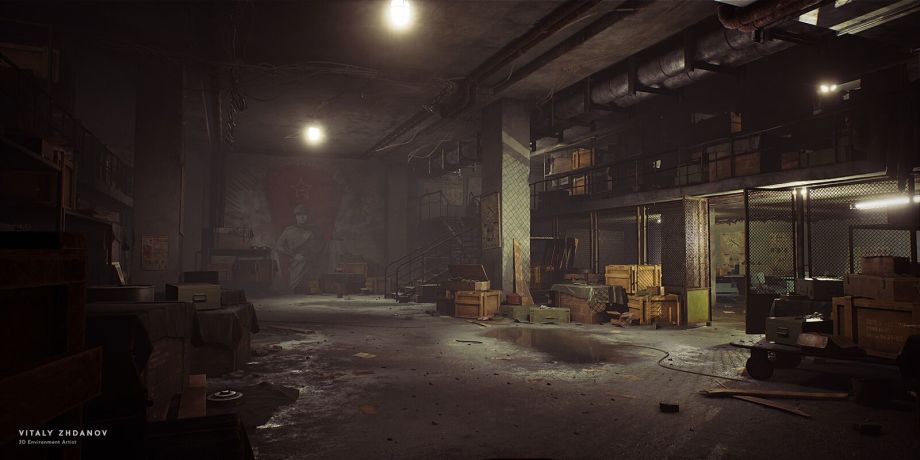
At a certain point, I understood that the scene lacked some kind of main object which would draw enough attention. I went back to references in Pinterest and searched for an interesting wall drawing. I was lucky to find the photo with high enough resolution to make a decal from it.
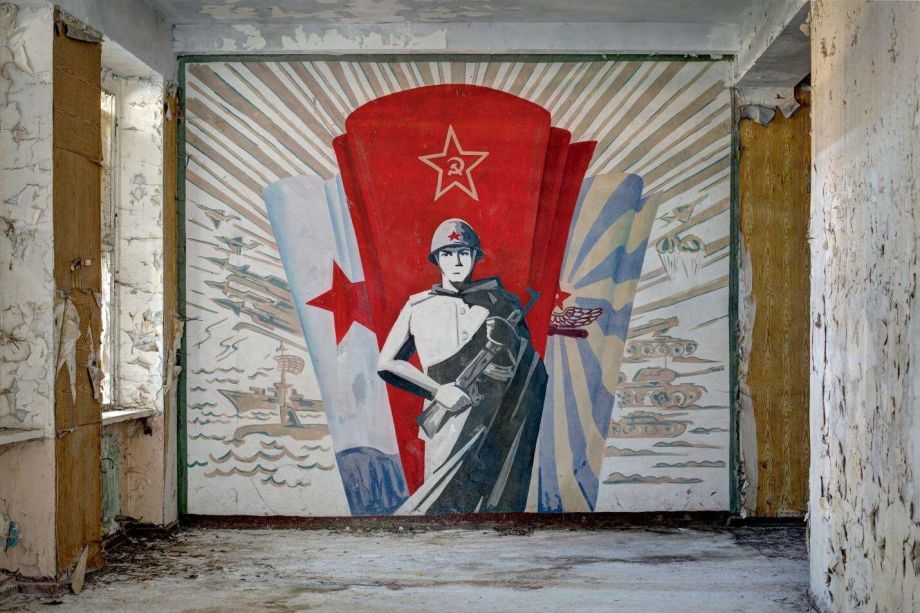
With this drawing, my scene started to look more alive and sharp.
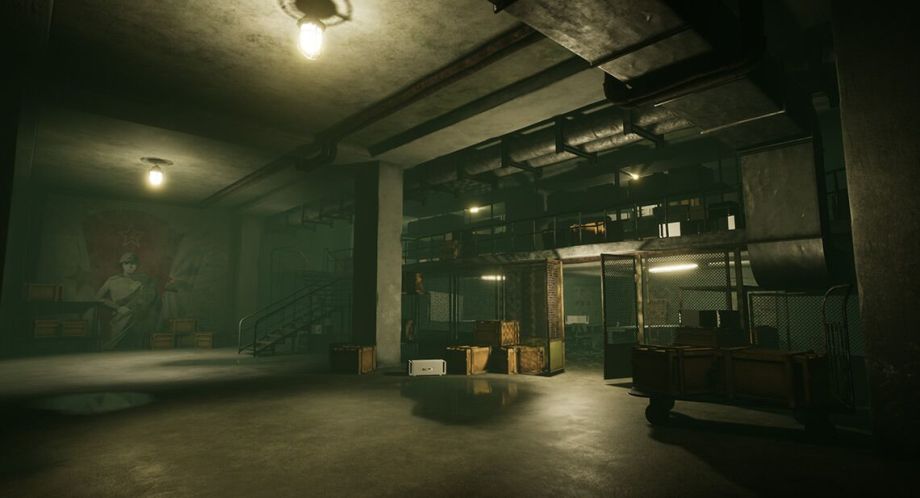
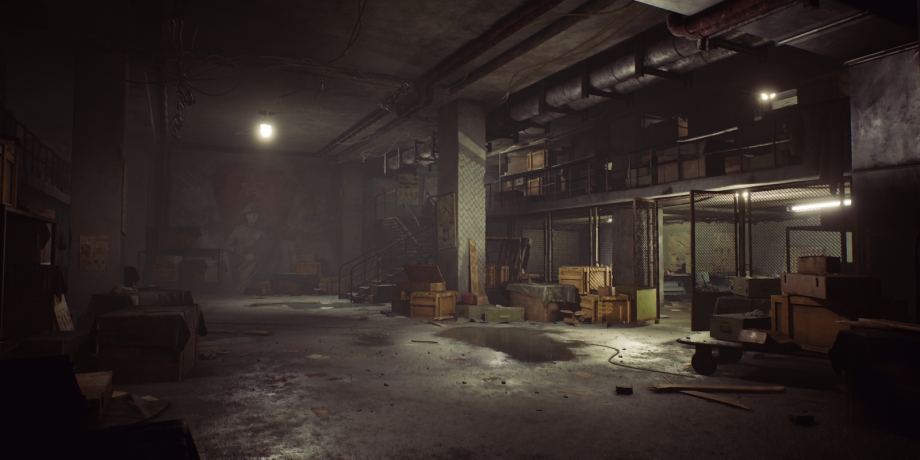
Lighting and Post-process
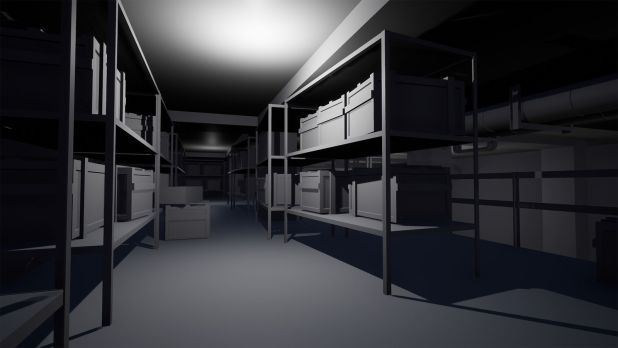
When the objects were ready, I began setting up the light and spent about two days on this lighting process. First, I added a subtle fog to give some depth and atmosphere. After experimenting with a few variants, I realized that the light looks quite simple with any of them. So, once again, I returned to my references to inspect them closely with regard to the lights and shadows and this time I detected this purple (violet) hint in the shadow color. That was a good starting point for adjusting the skylight and exponential height fog parameters.
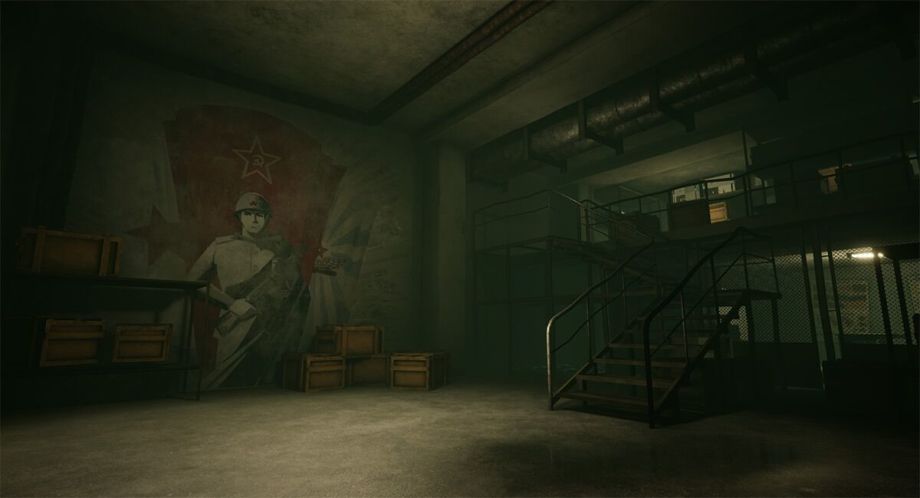
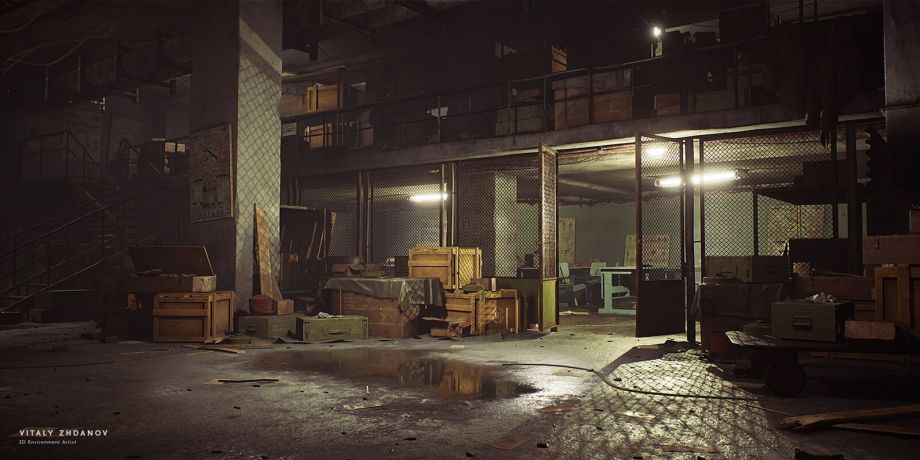
I always tried to check the overall look from different cameras and different camera angles. As written before, my main vision was determined at the beginning, so I could experiment with light sources to enforce that visual impression. I tried moving the point light behind the door and noticed an interesting shadow of the chain-link on the column. Even though I understood that such effect would be unrealistic, I have still decided to leave it at that because it brings more artistic interest to the composition.
After all the lights had been established, I moved to post-process set up. At the end I opened the screenshot of the scene in Photoshop where I finally tonemapped it for the desired look and imported the LUT texture into post process.
Details and polishing
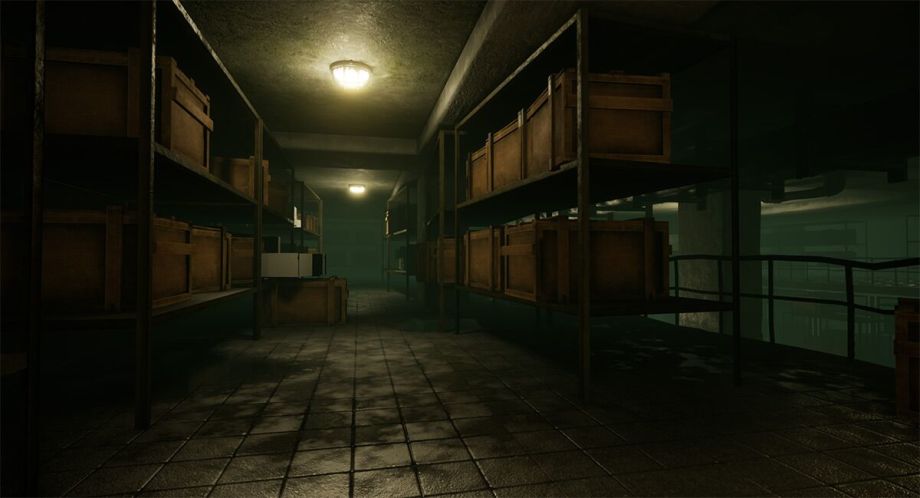
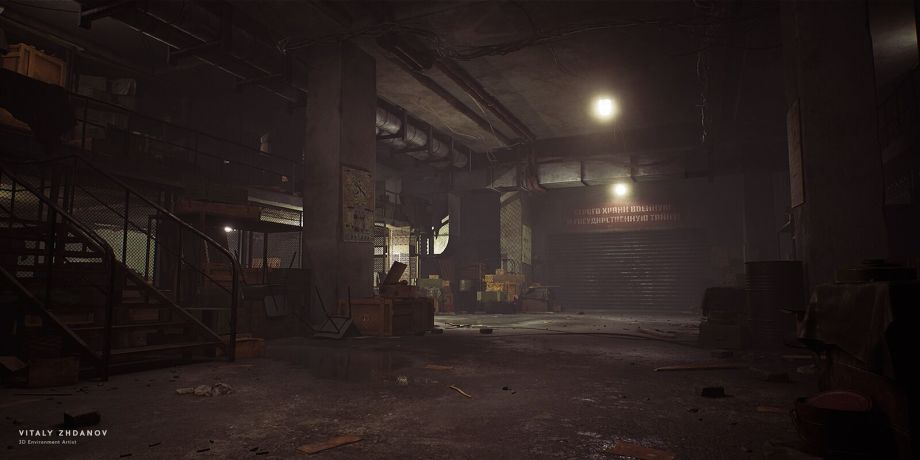
I continued to detail the scene. At the end of the class my scene looked like this:
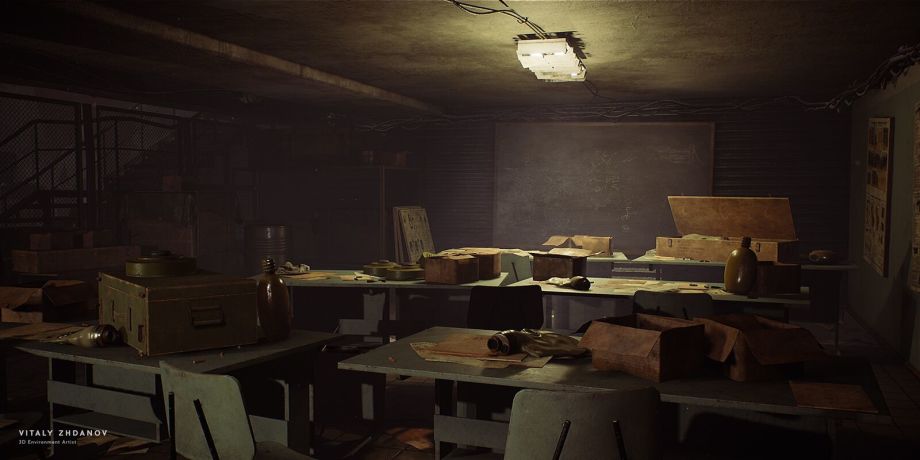
It looked quite nice but it still lacked some additional details and there were still plenty of things to work on. I decided to spend two more weeks to push the piece to its completion. During the first week, I fixed certain bugs and problems with lightmaps, made a few new objects such as cloth, mines, gas masks, bullets, holders for wires and etc. Below is my final result:
The second week was to prepare the work for publication on Artstation. I made several beauty shots and set up camera flythrough for future video.
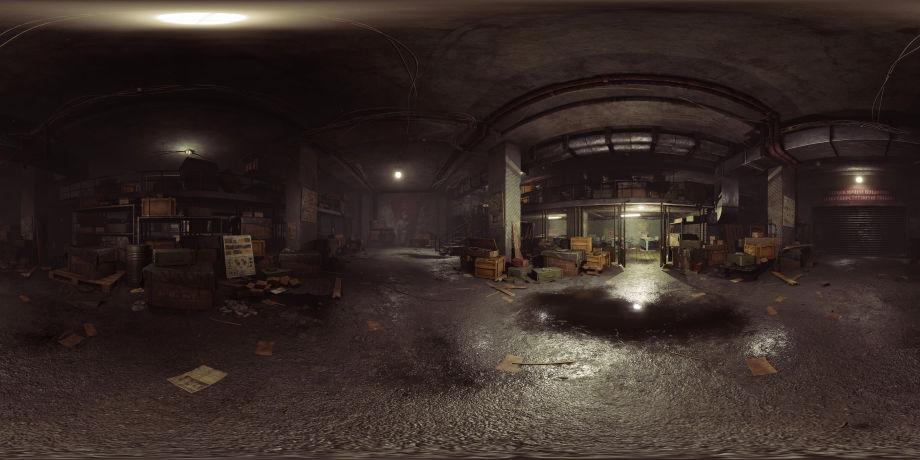
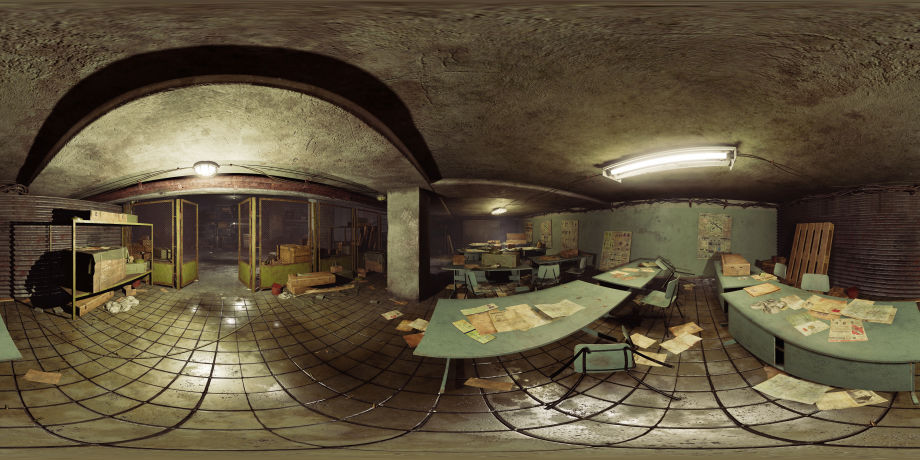
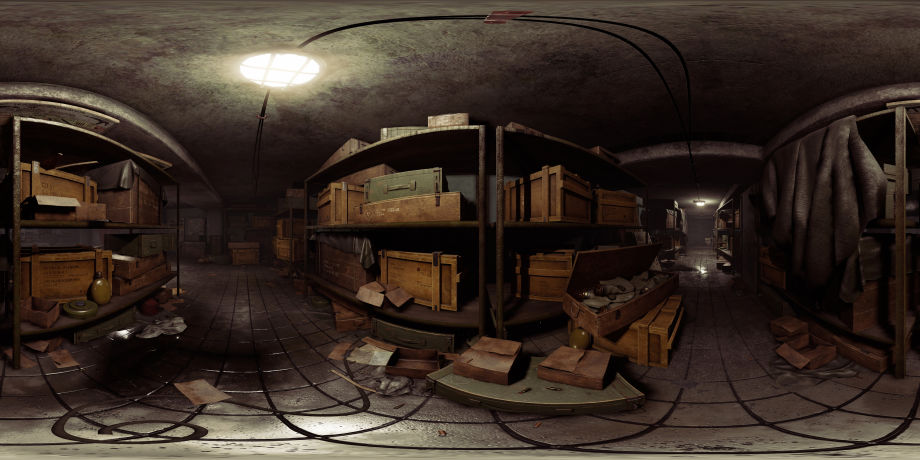
With help of guide by Clinton Crumpler I also made some 360 screenshots.
Conclusion
The whole project took me about two and a half months. I usually worked on it after the designated weekday hours and throughout my weekends.
Apart from lots of new interesting approaches and techniques of modular assets creation that I learned, this class gave me the opportunity to make a full-fledged scene for my portfolio in a limited period of time, with deadlines each week. I’d like to thank Clinton Crumpler for his feedback, advice and Q&A sessions.
I have also completed two other classes from CGMA, which are Vegetation and Plants for Games by Jeremy Huxley and Texturing and Shading for Games by Kurt Kupser. I really enjoyed these classes also and soon you can see the result of my work on my Artstation profile.
Interview conducted by Kirill Tokarev.
Learn more about the "UE4 Modular Environments" CGMA class here.
